%20(1).png)
Search Results
85 results found with an empty search
- Guides, Porters & Trekking Agencies for the Everest Base Camp Trek
On the way to Ama Dablam Base Camp with our Guide & Porter This blog provides information on the selection of trekking agencies and the hiring of guides and porters. Click here to read my other blogs about the Everest Base Camp and Everest 3 Passes treks. Contents TIMS Cards Nepalese Trekking Agencies Foreign Trekking Agencies Hiring Guides and Porters at Lukla Links to my Everest Base Camp Blogs 1. TIMS Cards The Nepal Tourist Board had announced that the provisions of the Trekker Information Management System (TIMS) were changing effective 1 April 2023. Prior to 1st April 2023 trekkers could buy their own TIMS Card for NPR 1,000 and trek without a guide. From 1st April 2023 the new announcement meant that only trekking agencies would be able to obtain the TIMS cards for trekkers, at the increased cost of NPR 2,000, and all trekkers had to be accompanied by a guide. There is a Tripadvisor forum topic on this subject. It has up to date information from trekkers about any enforcement of the Tourist Board's edict about guides. The reality is that it isn't being enforced and you can continue to trek without a guide except in the restricted areas of Nepal like before. The only difference is that independent trekkers can't buy a TIMs card. However, independent trekkers are no longer being required to have one. The Everest Base Camp trek is not in a restricted area but you need to buy 2 permits whilst trekking: The Khumbu Pasang Lhamu Rural Municipality Permit costs NPR 2,000 and is bought at Lukla airport. The Sagarmatha National Conservation Area Permit costs NPR 3,000 and is bought in Monjo. 2. Nepalese Trekking Agencies There are numerous trekking agencies in Nepal and some of them are very good and others aren't! Some trekking agencies only sell packages that include food and accommodation. This enables trekking agencies to make higher profits as it is difficult for trekkers to ascertain the actual costs. It can also benefit the guides as they are given a lump sum to cover costs and anything left over is theirs to keep! Good agencies will always give enough to cover all potential costs. Bad agencies will give the minimum, which can cause a problem for the trekker towards the end of a trek. The accommodation provided will usually be for a basic room. If you want a room with an attached bathroom you will normally have to pay the difference to the guide. If you do take an all inclusive package it is important to determine beforehand what food and drink is included. For example: Can you have a starter and a main course? How many hot drinks per day are included? A far better approach is to only pay the trekking agency for the cost of porters, guides and transportation. The cost of the porters and guides should always include their food and lodging. Porters and guides can be hired through agencies from about $20 a day for a porter and $25 a day for a guide. The guide will often travel with you from Kathmandu and their airfare will be extra. Their airfare is far less than for a foreigner. Porters will usually join trekkers in Lukla and any transportation costs for them is for your account. Be aware that porter guides probably won't speak English very well. Some local trekking agencies will want a deposit for the Everest Base Camp trek. The deposit shouldn't be more than the cost of the flights. Don't pay more than necessary If you want to organise your own trek I can recommend 3 local trekking agencies: Enjoy Nepal Treks . I used them in 2023 for the Kanchenjunga and the Langtang/ Gosainkunda/Helambu treks. I paid $25 a day for a porter/guide but the cost has now increased to $30 a day. I paid for my own food and accommodation but they also offer all inclusive packages. They are an excellent agency. Nepal Sanctuary Treks . They are the local agents for The Mountain Company and I have used them 3 times. They are not be the cheapest as their packages include food and accommodation. However, they will be substantially cheaper than a foreign trekking company. Visit Himalaya Treks . I have never used them but recently met one of their small groups on the way to Makalu Base Camp. I have also read the blogs of 2 frequent trekkers to Nepal who highly recommend them. Again they are not be the cheapest as their packages include food and accommodation. However, they will be substantially cheaper than a foreign trekking company. 3. Foreign Trekking Agencies Legally foreign trekking companies have to employ a Nepalese trekking agency to organise their treks. As a result their treks to Everest Base Camp are far more expensive than those of a local agency as they make a healthy profit on top of the local agency's cost. Some foreign companies send a westerner to lead treks which increases the cost even more. I wouldn't want to trek with a group when the accommodation is in tea houses/lodges as for the Everest Base Camp trek. It is better, and cheaper, to organise one's own trek through a Nepalese agency. I like to select my own accommodation and try to avoid busy lodges. You can't do this with a group and usually have to share a room. I have trekked twice with groups in Lower and Upper Dolpo as they were camping treks. They would have been expensive to organise for one person. However, some people prefer to trek with a group and most foreign trekking companies offer group lodge treks to Everest Base Camp, as it is one of the world's most popular treks. I can recommend 2 foreign companies: The Mountain Company is a British company which arranges basic and luxury lodge treks for Everest Base Camp with Nepalese guides. It is a good company and I used them when trekking in Upper Dolpo. Kim Bannister of Kamzang Journeys personally leads one trek a year to Everest Base Camp. She knows the area and local people very well and she has an excellent reputation. I have never trekked with her but did briefly meet her while trekking in Lower Dolpo. 4. Hiring Guides and Porters at Lukla You can hire guides and porters at Lukla airport and there are usually several touting for business as you exit the airport. It is safer to recruit through a local hotel in case any problems arise during the trek. 5. Links to my Everest Base Camp Blogs My Daily Reports on the Everest 3 Passes Trek Day Hikes on the Everest Base Camp Trek Lodges and Tea Houses on the Everest Base Camp Trek When to trek to Everest Base Camp What to take for the Everest Base Camp Trek Kathmandu to Lukla and Back Forum Posts, Vlogs & Webcams for Everest Base Camp Trek
- Trip Report for the Everest 3 Passes Trek
A view on the way up Kongma La Lani and I did the Everest Base Camp trek in May 2014 with a porter/guide and had fabulous weather and no crowds. We returned in May 2022 to do the more difficult Everest 3 Passes trek with a porter and a guide. Unfortunately the weather wasn't as perfect this time but the trail wasn't busy. This blog is a daily trip report of our 19 day Everest 3 Passes trek. I have also done several other blogs providing information and advice for trekking in the Everest region. See my Everest Base Camp Trek page for details. Contents Flight from Kathmandu to Lukla Hike to Namche Bazaar Namche to Khyangjuma via Khunde & Kumjung Khyangjuma to Pangboche via Phortse Hike to Ama Dablam Base Camp Pangboche to Dingboche Dingboche to Chukhung Day Hike towards Amphu Labsta Phedi Crossing the Kongma La Lobuche Lobouche to Dzongla Crossing the Cho La Dragnag to Gokyo Hike up Gokyo Ri Crossing the Renjo La Lumde to Namche Bazaar Namche Bazaar to Phakding Phakding to Lukla Flight from Lukla to Kathmandu Links to my other Everest Base Camp Trek Blog s 4 May 2022 - Flight from Kathmandu to Lukla We were informed that the guide and driver would collect us from our hotel at 05.00 for our 06.00 flight from Kathmandu to Lukla. We were panicking as they didn't get to our hotel until 05.25! We arrived at the airport at 05.45 but didn't miss our flight as all flights to Lukla had been delayed due to bad weather! After 3 hours at Kathmandu airport we decided to pay an extra $600 to fly by helicopter, but the weather was too bad even for that. After hours of listening to extremely loud airport announcements the tedium was broken by a bomb scare. Someone had called from Pakistan and reported that several bombs had been planted in the domestic terminal. Everyone had to leave the building and sit in airport buses until sniffer dogs and bomb detectors had searched the building. Shortly after being allowed back into the terminal it was announced that our flight was boarding. By 13.10 we had landed in Lukla, which they boast is the world's most dangerous airport! I was very pleased we hadn't paid the extra $600 for a helicopter. We had lunch at Lukla and then hiked 4 hours to the small village of Bengkar. The new and best lodge had 4 other trekkers in so we stayed in a more basic tea house that had more character and no other guests. 5 May 2022 - Bengkar to Namche Bazaar We left our tea house at Bengkar at 07.50 and arrived at Namche Bazaar 4 hours later, after climbing 800 metres in fairly nice sunny conditions. Namche is at 3,450 metres and is the largest village on the trail for the Everest Base Camp trek. Namche has everything a trekker could want! We found a nice ensuite room with a small balcony in the upper part of Namche. The hotel association (cartel) in Namche has set the room rates and as a result rooms are expensive. We had to pay NPR 2,000 but negotiated free hot showers. It was very quiet when we arrived, but a noisy group arrived afterwards and took over the dining room. See my blog Lodges & Tea Houses on the Everest Base Camp Trek . 6 May 2022 - Namche to Khyangjuma via Khunde & Kumjung Namche Bazaar is at an altitude of 3,450 metres and one should spend 2 nights there for acclimatisation before proceeding on the Everest Base Camp trek. For our acclimatisation day we chose to do a half day acclimatisation walk to the villages of Khunde (3,840 metres), Kumjung (3,780 metres) and Khyangjuma (3,550 metres). Unfortunately we had woken up to cloudy weather and after walking for an hour it rained a little and got colder. As a result we didn't see the mountains at all and it was a dreary walk. This bad weather was unfortunately meant to continue for a few days. We were lucky that there was a gathering of monks at Kumjung monastery reciting scriptures. It was atmospheric and much better than visiting the usual deserted gompas. When we reached Khyangjuma we stayed there for the night rather than going back to Namche. Khyangjuma is only 100 metres higher than Namche and therefore at an acceptable altitude for acclimatisation for the Everest 3 Passes trek. This reduced our next day's walk by 1 hour. We stayed at a newly built lodge where all the rooms had attached bathrooms. The room cost NPR 1,000, which was half the price of our lodge at Namche. 7 May 2002 - Khyangjuma to Pangboche via Phortse We woke up to low clouds, but by the time we left the lodge it was sunny and warm and we caught glimpses of the mountains. We had chosen to do the higher and more scenic route to Phortse. This trail to Everest Base Camp isn't busy with trekkers but is longer! We reached the top of the Mong La (4,000 metres) after 2 hours and then immediately descended steeply down to the river! As soon as we got to the river we climbed 200 metres back up again to Phortse (3,810 metres). Almost 4 hours of walking. At Phortse we had dal bhat for lunch with its usual refills of rice, dal and vegetables. After lunch the cloud started to come in and by 15.00 we had showers and the visibility was down to about 100 metres. We were soon adding several layers over our T shirts! Our guide said we would climb 100 metres and then walk on a plateau to Pangboche. The bit about the plateau wasn't accurate. It turned out to be Nepali flat which entails constant ups and downs! We reached Lower Pangboche (3,900 metres) after almost 3 hours from Phortse and Lani was very tired. We found a room with an attached bathroom for NPR 1,500. We negotiated free charging of electronics as it would otherwise cost NPR 300 per device. 8 May 2022 - Hike to Ama Dablam Base Camp It was raining when we woke up at 06.00, but the weather had improved by the time we left for Ama Dablam base camp at 07.45. The walk began with a 100 metre descent to the river, followed by a 800 metre ascent to Ama Dablam base camp. It took 3 hours 15 minutes to reach base camp and Lani struggled with the altitude. There are 3 lodges near Ama Dablam base camp that cater to the mountaineers and we had dal bhat at the only lodge that was open. It took us 1.5 hours to descend. Initially it snowed a bit, followed by light rain and then sun as we neared Pangboche. Unfortunately we didn't get any views of Ama Dablam all day! See my blog Day Hikes on the Everest Base Camp Trek 9 May 2022 - Hike from Pangboche to Dingboche Yesterday evening we had limited mountain views and this morning we could actually see the top of Ama Dablam! We stayed in lower Pangboche because of altitude acclimatisation. Before setting off to Dingboche we climbed 100 metres to see the more traditional upper Pangboche. We looked around the 600 year old gompa and found out that photos weren't allowed only after taking one! Some villagers started praying in the upper part of the Gompa and we were allowed in. It was really impressive with all the masks used for ceremonies, but again no photos were allowed. It took us 3 hours to reach Dingboche. We were slow but some other trekkers going to Everest Base Camp were even slower. I was starting a cold and didn't feel well for the first part of the trek. Lani was also feeling a bit off. There are lots of lodges in Dingboche but when we hiked to Everest Base Camp in 2014 we found the majority were pretty dire. This year we found the Hotel Tashi Delek, which cost NPR 1,000 for a nice corner ensuite room. We had our first showers for 3 nights (NPR 600 each). They will probably be our last showers until we reach Gokyo in 7 nights time! We could no longer use our mobile phone data package and had to pay NPR 700 each for internet. It is amazing that we could access the internet at all. 10 May 2022 - Hike from Dingboche to Chukhung I had a bad night because of my cold. Lani claimed she hadn't slept well either, despite hearing her sleeping soundly throughout the night! We woke up at 06.00 to the usual low clouds or mist! I felt very despondent as we have come to see the Himalayas. We had our usual breakfast of oat porridge (now costing NPR 600) and ginger tea, and then packed up. A lot of the clouds had cleared by the time we started walking. We walked for 3 hours from Dingboche (4,400 metres) to Chukhung (4,700 metres) with fantastic views of Ama Dablam and partial views of other mountains. It should have been an easy walk, but I struggled because of my cold. By the time we got to Chukhung I had no energy left for going around the lodges to select the best one. We went to the Khangri Resort which has the best reputation. We thought the Khangri Resort had attached bathrooms but none of the lodges in Chukhung do. Initially we accepted a dark downstairs corner room, but then our guide found us a really nice and bright upstairs corner room. The lodge has a bright warm sun room and we had it all to ourselves. The cost of a room is only NPR 500. 11 May 2022 - Day Hike towards Amphu Labsta Phedi We woke up at 05.45 to clear skies and fantastic mountain views. We left the Chukhung at 07.15 to walk towards Island Peak base camp. The mountain views were incredible and I was snapping away. We hiked for 2.5 hours to get to the turnoff to Island Peak base camp. Lani decided to return back to our lodge at this point and I continued towards to Amphu Labsta Phedi. This had been recommended on the Trip Advisor forum as a better option than Island Peak Base Camp. It involved crossing a precarious bridge and I have to admit our guide gave me a helping hand. There were 2 fantastic lakes on either side of the trail. The first one was the large, and very grey, Imja Tsho at 5,010 metres. It is carefully monitored as the glacial moraine holding the lake back is at risk of collapse. The second lake was Amphu Labsta Tsho which is a beautiful blue colour. We continued towards Amphu Labsta Phedi until there were no more views to be gained. It was a 6 hour round trek. 12 May 2022 - Crossing the Kongma La to Lobuche My guide hadn't been over the Kongma La pass (5,535 metres) before and there is a tricky glacier crossing on the other side. I therefore arranged to team up with 3 other trekkers and their 2 guides for crossing the first pass of the Everest 3 Passes trek. Lani hiked with our porter on the lower level route to Lobuche which goes via Dingboche and Dughla. This is the normal route for the Everest Base Camp trek. Both routes take about 8 hours. I got up at 03.50 and had breakfast at 04.30. My guide and I then walked over to another lodge to join the other trekkers. We started walking at 05.10 in very clear weather with little wind. We took our time with plenty of breaks to enjoy the fantastic mountain scenery. It was a relentless climb up to the top of Kongma La (5,535 metres) with the hardest part being the final very steep ascent to the top. We had lunch at the top and our small group had the summit to ourselves. The descent was steep with very rocky and difficult terrain initially. There were a couple of small rockfalls but no one was hit. After the steep descent we reached the difficult crossing over the Khumbu glacier to reach Lobuche (4,900 metres). None of the guides had crossed the Khumbu glacier in the last 3 years and the route constantly changes. It took 15 minutes to find the start of the route and then it was fairly straightforward. However, the terrain over the moraine was undulating and difficult. I reached Lobouche after a hard 9 hour walk. I grabbed the last ensuite room at the New EBC Guest House. Within 20 minutes I spotted Lani and our porter outside. There were far too many people at Lobuche and we decided not to go to Everest Base Camp the next day as the lodges would be awful if fully occupied. We went to Everest Base Camp in 2014 so missing Everest Base Camp wasn't a problem. 13 May 2022 - Lobuche We woke up at 05.00 to take advantage of the usual early morning clear skies. We left the lodge at 06.15 to hike a high ridge with excellent mountain views. Lani was walking slowly as she has a cold and a bad cough, probably the Khumbu cough that is caused by the cold and dry air at high altitude. We walked to the Pyramid, which was an Italian weather or research centre, and part of the facility is now a lodge. We had tea there and looked around the lodge. From the Pyramid it was a steep climb up to the top of the ridge, perhaps 5,300 metres. Lani did very well to make it but struggled. The views were excellent. By 08.30 clouds were rolling up the valley and by 09.30 the mountains were obscured. Lani needed another night in Lobuche to acclimatise before going on to Dzongla. Our guide managed to phone the lodge and persuaded them to let us keep the room, even though it was reserved! A lot of the cloud cleared in the afternoon so I walked up the steep west side of the glacial moraine ridge that I crossed yesterday. It is about a 20 minute walk and there are good views of the mountains and the glacier from the top. 14 May 2022 - Hike from Lobouche to Dzongla We woke at 05.30 to clear skies and good mountain views. By the time we finished breakfast low cloud or mist had obscured the mountains. Luckily, the sun came out and the cloud cleared, about half an hour into our 3 hour walk from Lobouche to Dzongla. The scenery was superb although the path was narrow and with steep drop offs at times. Lani was still struggling with the Khumbu cough and it was clear that she wouldn't manage the Cho La Pass tomorrow. We decided that Lani would go slowly back down to Namche with our porter, while I continued on the Everest 3 passes route with our guide. Khumbu cough only improves at lower altitude. This meant Lani and I would be apart for 4 nights and I would have to carry what I needed. In the evening our guide spoke to a small group that were doing the Everest 3 Passes trek and had just crossed the Cho La Pass from the west. They said that the glacial ice on the western downward side was slippery so I might have to use my microspikes. 15 May 2022 - Crossing the Cho La Pass It was a disappointing day of weather. We could clearly see the mountains when we set off for the Cho La pass at 05.20. However, clouds quickly rose up the valley and by 05.30 there were no views. I found the hike up the Cho La pass to be a hard slog especially as I was carrying all my things, except my sleeping bag which was kindly carried by my guide. After a couple of hours we reached the glacier and I put on my microspikes which made walking easier. It took about 3 hours to reach the top of Cho La pass (5,420 metres) and I met 3 people I knew at the top. A cable was installed about 3 years ago to help with the initial descent down the western side of the Cho La Pass. My microspikes were still very useful as the trekker in front of me didn't have any and slipped several times. We reached the lodges at Dragnag after walking 6 hours. I was tired and after having lunch decided to stay the night. Most other trekkers continued walking for a further 2 to 3 hours to Gokyo. I managed to phone Lani who had reached Debouche at 3,800 metres. The lower altitude had already improved her cough, which had been very bad last night. She was staying in the new and very comfortable section of the Rivendell Lodge. 16 May 2022 - Hike from Dragnag to Gokyo We walked from Dragnag (4,700 metres) to Gokyo (4,790 metres) and the trail was mainly over the massive Ngozumpa glacier. The new starting point for the Ngozumpa glacier crossing was not marked and we were lucky to find it. After that the trail was well marked. I really enjoyed crossing the Ngozumpa glacier and often observed rocks falling into the lakes in the middle of the glacier. It was a steep climb up the ridge on the other side of the Ngozumpa glacier and there was a rope in place to facilitate this. After crossing the Ngozumpa glacier we had good views of Gokyo village and lake. There are 6 lakes in the Gokyo valley and the village is on the third lake. It took 3 hours to get to Gokyo. I checked into the Cho Oyu lodge and got a nice corner lake view room with shared toilets for NPR 500. In the afternoon I walked to Gokyo's fourth lake with someone I met a few days ago. We intended to go onto the fifth lake but it was too far. 17 May 2022 - Hike up Gokyo Ri I planned to walk up Gokyo Ri (5,360 metres) if the weather was clear enough. At 05.00 there was low cloud but by the time I had my usual breakfast of porridge and ginger tea at 06.30 the clouds had cleared. I rushed up Gokyo Ri in 1.5 hours, overtaking everyone in sight trying to reach the top before the clouds came in again. Just as I got to the top of Gokyo Ri most of the mountain views were obscured by clouds! Luckily the clouds cleared after about half an hour and I stayed at the top of Gokyo Ri for a further 2 hours to enjoy the views. I could see the peak of Everest for the first time on this trip. In the afternoon I enjoyed an expensive shower costing NPR 800 followed by a solitary 1.5 hour walk to Gokyo's first and second lakes. Incidentally since Lani took our toothpaste I had to buy a foul tasting tube of toothpaste for NPR 600. I couldn't even buy soap from the only shop (shack) in Gokyo but luckily there was some in the shower stall. 18 May 2022 - Crossing the Renjo La I had another early breakfast and we left Gokyo at 06.10 in very good weather to cross the final pass of the Everest 3 Passes trek. It took 2.5 hours to reach the top of Renjo La (5,360 metres). Renjo La is meant to be the easiest of the passes on the Everest 3 passes trek, but we had been warned that there was a lot of snow on the other side. We found that the report of the snow was true but luckily it hadn't turned to ice. After spending about an hour on the top of Renjo La enjoying the great views we put on our micro spikes/crampons and descended. Initially the trail was narrow with a large drop off on the one side. It took us just over 2 hours to reach the small settlement of Lumde (4,368 metres) where we had lunch. The lodge had nice rooms with a squat toilet for NPR 500 so we stayed there. It was very sociable with 3 people I had met before (an Israeli, German and Kiwi). The lady running the lodge was also very pleasant. 19 May 2022 - Hike from Lumde to Namche Bazaar We walked from Lumde to Namche Bazaar via Thame. We climbed up to the monastery at Thame so we could visit the 600 year old monastery and also to try to get a phone signal to contact Lani! After a lot of difficulty we finally managed to get through to Lani and arranged to meet her for lunch further down the trail at Thamo. Lani had warned me that 19 Everest Base Camp marathon runners had arrived at her hotel in Namche the previous night! Luckily they weren't too noisy and we had a room in a separate annexe with a little balcony. I had 2 pieces of chocolate cake to celebrate being back in civilisation! 20 May 2022 - Hike from Namche Bazaar to Phakding We had an easy 3 hour or so walk down to Phakding and stayed in a nice lodge which had spacious rooms with attached bathrooms for NPR 1,000. There was only one other couple there. 21 May 2022 - Hike from Phakding to Lukla We tried a different route from Phakding to Lukla. Virtually everyone doing the Everest Base Camp trek uses the path on the east bank of the river, but someone on the Trip Advisor forum had recommended the west bank from Phakding to Ghat. It was a quiet and scenic route along the river. After 3.5 hours we arrived at Lukla and tried to fly out a day early without success. See my blog Forum Posts, Vlogs & Webcams for the Everest Base Camp Trek for Tripadvisor recommendations and trip reports. We stayed at a very nice lodge in Lukla and all the rooms had attached bathrooms for NPR 1,000. The only problem was a noisy group of 14 women from the Middle East staying there. 22 May 2022 - Flight from Lukla to Kathmandu Our flight was at 06.30 but we woke up to rain. It rained all morning and we didn't think there would be any chance of flying out that day. At midday we were resigned to spending another night in Lukla and had an early lunch. As we ate our lunch the weather started to clear and just as we finished we were told to quickly go to the airport. The airport was only 5 minutes walk away. The owner of the lodge had connections with the airlines he very kindly arranged our boarding passes for us. Just over an hour later we were back in Kathmandu! Links to my other Everest Base Camp Trek Blogs Day Hikes on the Everest Base Camp Trek Lodges and Tea Houses on the Everest Base Camp Trek When to trek to Everest Base Camp Kathmandu to Lukla and Back What to take for the Everest Base Camp Trek Forum Posts, Vlogs & Webcams for Everest Base Camp Trek Guides, Porters and Trekking Agencies
- England to Morocco Road Trip - Week 1
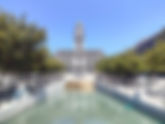
Cordoba Cathedral Contents 31 March & 1 April 2024 - Plymouth to Santander, Spain 2 April 2024 - Salamanca, Spain 3 April 2024 - Salamanca to Toledo, Spain 4 April 2024 - Toledo to Cordoba, Spain 5 April 2024 - Cordoba to Granada, Spain 6 April 2024 - Granada, Spain 7 April 2024 - The Alhambra at Granada, Spain 8 April 2024 - Granada, Spain Links to other blogs about our road trip 31 March & 1 April 2024 - Plymouth to Santander, Spain We live a 40 minute drive from Plymouth so Brittany Ferries' sailing from Plymouth to Santander is very convenient for us. The voyage takes about 22 hours and it saves 2 to 3 days of driving. I have driven from the UK to north west Spain twice before and the scenery isn't that great. We booked a 4 berth cabin with a window as all the 2 berth cabins had been reserved. It wasn't cheap as the cabin cost £160, but it was worth having a private space with a view and some daylight. The return voyage cost £1,000 so we may not be saving much by taking our own car instead of flying and renting cars. However, the ferry is much more pleasant than taking an early morning flight. It is also convenient having everything in our own car for the entire 10 week trip to Morocco. I just hope our 2013 Ford Focus doesn't have any mechanical problems! The voyage went well and although the weather wasn't bad the ship did sway a fair amount when crossing the Bay of Biscay. Brittany Ferries use their largest ship for the Plymouth to Santander crossing and it's more stable. Unfortunately Lani went to the bathroom in the night and fell into the shower. I am glad that we weren't on the previous sailing as there was a storm then. We arrived in Santander at 15.30 the next day. It didn't take long to disembark from the ferry and to get through Immigration and Customs. From there it was a 4 hour drive to Salamanca and we arrived at the Parador de Salamanca around 20.00. We haven't stayed in a Parador before and this is the only one I have booked for this trip. It is a modern Parador about a 20 minute walk to the centre of Salamanca. I booked a superior room as these rooms have a good view of the cathedral and it cost of £87.50 per night. We were very pleased with our room at it was quiet, spacious and had a good view. 2 April 2024 - Salamanca, Spain We booked 2 nights at the Parador de Salamanca so that we would have a whole day to visit Salamanca. Rain was forecast from mid afternoon so we had breakfast as soon as the restaurant opened at 07.30. As it was our first stay at a Parador we were given a voucher that gave us one free breakfast and that saved about Eur 40 for the two of us. It was a very good breakfast and we ate far more than we normally would. Usually we would just have a bowl of porridge but the food was too tempting. After breakfast we walked into the centre of Salamanca over the old Roman bridge. Unfortunately the weather was cloudy and dreary but good weather was forecast from tomorrow. The cathedral is the main sight in Salamanca. It is massive as it consists of 2 cathedrals joined together. The old cathedral wasn't demolished when they built the new one in 1513. For an additional fee we also climbed up the tower and onto the roof of the cathedrals. The views weren't great but it was interesting see how the 2 cathedrals were joined together. We also paid to enter the Universidad de Salamanca as its buildings date back to the 12th century. The library, chapel and one old classroom were the main things to see but we weren't that impressed. The other sights in Salamanca were the Casa de las Conchas (House of Shells) which is now a library and the Plaza Mayor. The Plaza Mayor is very elegant as it enclosed by a continuous 4 storey building and the town hall. We walked around Salamanca until 15.00 when it started to rain as had been forecast. By then we had seen everything in Salamanca that we had wanted to see. Soon after we got back to the hotel the weather cleared and the sun finally came out. That wasn't forecast! In the evening we walked back into Salamanca and had a seafood Paella for Eur 36. It would have been much more expensive to eat at the Parador. 3 April 2024 - Drive from Salamanca to Toledo, Spain When we arrived in Spain we were lucky to have missed several days of wet weather that had spoiled many of the Easter religious processions in Spain. The weather forecast was for sunny and dry weather from today and it turned out that the forecast was right! We left Salamanca at midday and arrived in Toledo at 15.00, which was our check in time for our next apartment. We had booked a 2 bedroom apartment in Toledo for 1 night through Booking.com for Eur 90. We were pleased with the modern apartment and importantly we had a parking space for our car in the basement of the building. It was about a 15 minute walk in to Toledo's historic centre and we visited Toledo Cathedral first. It was constructed over 2 centuries and opened in 1493. We bought a ticket for Eur 12 that allowed entry into 7 of Toledo's historic buildings. We managed to visit the following ones before they closed at 18.30: 11th century church of Saint Tome. The main attraction here is another El Greco " The Burial of Count Orgaz" painted in 1586. Sinagoga de Santa María built in 13th century but converted to a church in 1411. There are 25 horseshoe arches and 32 columns, creating a sense of space. Real Colegio Doncellas Nobles founded in 1551, an educational institution promoting women. Monastery of San Juan de los Rey. Iglesia de los Jesuitas, We didn't visit Toledo's Alcazar (fort) as it is now an Army Museum and the Alcazar was rebuilt between 1939 and 1957 after the siege of the Alcazar during the Spanish Civil War. 4 April 2024 - Drive from Toledo to Cordoba, Spain It was sunny again today and we drove for 4 hours from Toledo to Cordoba. It seems that our car's air conditioning isn't working and we will have to try and get it fixed before we go on to Morocco. I had booked a 3 bedroom apartment in Cordoba for Eur 62 but unfortunately the sound proofing was poor and we could hear our neighbours very clearly. Fortunately they quietened down for the night and we managed to get 7 hours sleep. It was a 40 minute walk from the apartment to Cordoba's historic centre. As it was hot we took a bus in and walked back in the evening. We first visited the Mezquita as it is Cordoba's main attraction. The Mezquita is Córdoba's famous mosque which was completed in 787. In the 9th century it ranked third in sanctity in the Islamic world, behind Mecca and Jerusalem's Al Aqsa mosque. When the Christians conquered Cordoba in the 13th century it was converted into a cathedral. We then went to the Alcazar (fort), which is a Spanish fortress of Moorish origins, which was built in the 14th century. When we got to the entrance there was a long queue, probably about 70 people! We decided to wait and it turned out it was that busy because entry was free that day! The Alcazar housed the Inquisition (1428 to 1821) and it was then a prison until 1951. The buildings aren't very interesting but they contain some very fine Roman mosaics and a Roman sarcophagus. There are beautiful gardens surrounding the Alcazar. We finished the day by walking over the old Roman bridge and having dinner in the old Jewish quarter of Cordoba. 5 April 2024 - Drive from Cordoba to Granada, Spain It was a hot 3 hour drive from Cordoba to Granada. The car's air conditioner definitely wasn't working and needs to be fixed. I had rented a 2 bedroom apartment in Granada through Booking.com for 4 nights at a cost of Eur 488. The price included parking which can be very difficult in Granada. After the disappointment of the apartment in Cordoba I was relieved that the apartment in Granada was very good. It was on the 2nd floor of a modern apartment building and had a small balcony. The only drawback was that it faced onto a busy street and there was a lot of traffic noise. My priority was then to have the car's air conditioner fixed. I found a car repair chain called Feu Vert which had a workshop near us. I tried to book online and they an available slot at 17.00. Unfortunately booking online was impossible as they didn't accept British registration numbers and required a Spanish tax identification number. Luckily Lani has been learning Spanish and phoned them. We got the 17.00 appointment but it cost about 50% more as we hadn't booked online. Anyway the main thing was to fix the air conditioning as it wasn't pleasant driving in the heat. 6 April 2024 - Granada, Spain We explored Granada today and visited the cathedral first. We thought it was more impressive than the guide books said. By the time we left the cathedral the tour groups were in full swing and we had to queue to get into the Capilla Real. This is the Royal Chapel built as a mausoleum for Isabel and Fernando, the Catholic monarchs who liberated the city from the Arab rulers. Their coffins are in the crypt below and their figures, carved in marble from Carrara in Italy, lie behind a beautiful grille. Sadly photos are not allowed After that we visited the: Corral del Carbon dating back to the 14th century. Palaccio de la Madraza. It is now part of Granada university but it was originally an Arab university. It has a finely decorated Mihrab (prayer niche). Monasterio de San Jerónimo, The courtyard is filled with Orange trees and there is a beautiful church. Casa de los Tiros (the House of Shots) named for the muskets projecting from it's battlements. 7 April 2024 - The Alhambra at Granada, Spain I booked our tickets for the Alhambra in January as they often sell out way in advance. You have to select a time for visiting the Nasrid Palaces which is the main attraction of the Alhambra. I got tickets for 08.30 which is when the Alhambra opens in order to be able to see the palace before it became too busy. It was therefore an early start for us as the Alhambra was 45 minutes from our apartment. We arrived early at 08.00 and were first in the queue. That worked out well as when they let us in at 08.30 the people behind us had a problem with their tickets and we had the Nasrid Palaces to ourselves. We quickly walked through the Nasrid palaces to take photos before other visitors arrived. Then we went back to the start and spent an hour slowly walking through the beautiful palace that was built in the fourteenth century. The other 2 main sites in the Alhambra are the Alcazar and the Summer Palace. We went to the Alcazar first and climbed up 2 of the towers. It wasn't busy at all but unfortunately the weather was hazy and the views were spoiled. The Alhambra is a large site and it took about 15 minutes to walk to the Summer Palace. We stopped off at a church and hammam on the way. We found the summer palace to be a bit disappointing. The gardens weren't that impressive and nothing like the magnificent gardens at Cordoba's Alcazar. The buildings that we were allowed into weren't special and the views were spoiled by the haze. We spent 3.25 hours walking around the Alhambra and afterwards walked down to the historic centre of Granada. The owner of our apartment had recommend the Los Manueles restaurant for lunch. When we arrived at 12.00 the restaurant was empty but within half an hour it was completely full. It was an authentic Spanish restaurant mainly visited by Spaniards. The food was good and not expensive. In the afternoon we walked up to the Albaicin district of Granada. There is a mirador outside San Nicolas church with views over to the Alhambra. As it was Sunday it was busy and some guys were playing traditional Spanish music and a few girls were dancing to it. There was a nice atmosphere. 8 April 2024 - Granada, Spain This was our third full day in Granada and we took it easy in the morning. In the early afternoon we walked to El Ladrillo 11, a restaurant in the Albaicin neighbourhood, for a late lunch. We arrived at 14.30 and there were only 2 other people there. We were surprised that by 15.00 the restaurant was almost full. The restaurant had been recommended by the owner of our apartment and the food was very good. As often happens a street guitarist came and played a few traditional songs. After lunch we continued walking around the pretty streets of the hilly Albaicin area of Granada and then continued on to the nearby Sacromonte district. The Sacromonte area is also on a hill and is known for its cave dwellings but we didn't see any. There was a museum with several of these cave dwellings but we weren't interested in visiting a touristy version. Another attraction of Sacromento are the excellent views of the Alhambra. Yesterday our views were spoiled by haze but the weather was much clearer today. We could clearly see the snow covered Sierra Nevada mountains. We finished by walking back along the pretty Rio Darro to the centre of Granada. Links to other blogs about our Road Trip from England to Morocco Week 2 - Spain to Morocco Week 3 - Southern Morocco Week 4 - Marrakesh to Todra Gorge Week 5 - Todra Gorge - Merzouga - Fes - Chefchaouen Week 6 - Morocco to Cadiz & Seville Week 7 - Seville to Portugal Week 8 - Porto to Pontevedra, Spain Week 9 - Muxia & the Lighthouse Way Week 10 - Muxia, Spain to Plymouth, U K
- Muxia, Spain to England - Week 10
The Caprice in Comillas Contents 6 June 2024 - Muxia to Suances, Spain 7 June 2024 - Day Trip to Santillana del Mar 8 June 2024 - Day Trip to Comillas 9 June 2024 - Suances 10 & 11 June 2024 - Santander & Plymouth Links to other Blogs about our Road Trip 6 June 2024 - Drive from Muxia to Suances, Spain We were sad to leave Muxia this morning as it is a small friendly town with a relaxed atmosphere. We drove 5.5 hours eastwards from Muxia in Galacia to Suances in Cantabria. Suances is only a half an hour drive from Santander where we will be taking the ferry back to Plymouth. After driving for about two hours we encountered some very thick fog. The visibility was very poor and we followed a truck until the fog cleared after about 10 kilometres. That area must be prone to fog as they had special lights on both sides of the carriageway to guide us. The weather was pretty miserable the whole journey and clouds blocked the mountain scenery. Unfortunately the weather is meant to be bad until we return to the UK in 4 day's time. We were delighted with our very modern and bright 3 bedroom penthouse apartment in Suances. We had booked it through Booking.com for Eur 104 per night which was an absolute bargain for such a fantastic apartment. It was the best accommodation of our entire 10 week trip and I highly recommend it. Suances is a small town split into the upper town, where we're staying, and the lower beach area. Our apartment was in the centre of the upper town and after settling in we walked around Suances and did some grocery shopping. 7 June 2024 - Day Trip to Santillana del Mar We were pleased to wake up to a brighter day than had been forecast. We took advantage of it and visited Santillana del Mar which is only a 15 minute drive from Suances. Parking Publico is a very convenient car park by the tourist office and public toilets. There are ticket machines but there were signs stating it was free. Santillana del Mar is an exceptionally well preserved medieval town unspoiled by modern development. Unfortunately it can often be spoiled by a multitude of tourists as it is very popular with Spanish visitors. Santillana del Mar wasn't very busy when we visited though. Santillana del Mar has 2 main pedestrianised cobbled streets with well preserved medieval buildings. Unfortunately most of them are now shops and restaurants for tourists. The main square is the Plaza Mayor. The main sight to visit in Santillana del Mar is the Romanesque Collegiate church of Santa Juliana. It started as a monastery in the mid 12th century. A group of monks built it in an effort to contribute to the repopulation of the area and to house the relics of the martyr Juliana. It is worth paying the small fee to enter it. We had lunch in Santillana del Mar and then returned to our fantastic apartment. 8 June 2024 - Day Trip to Comillas In the morning we drove to Suance's lighthouse and walked on the headland around it. There were good views of the beaches at Suances. Unfortunately it was a gloomy and breezy morning but at least it was dry! We then drove for 30 minutes to the town of Comillas. We tried to park in the very central Aparcamiento Comillas but it isn't a large car park and was full. Parking is free and there are public toilets there. We ended up parking in the free Parking Municipal del Polideportivo which has plenty of spaces but it isn't quite as central. The tourist office provided us with a useful map of Comillas with information on all the historic buildings that can be visited. We saw the most important buildings in Comillas which were: The Palacio de Sobrellano. It was built as a summer palace in 1888 by the First Marquis of Comillas and was the first building in Spain to use electric light. The First Marquis fled to Cuba as a 14 year old and made his fortune there before returning to Spain. It is free to wander around the gardens which is what we did. The impressive University Pontificia de Comillas was founded in 1890 and is a private university. We only viewed it from the gardens of the Palacio de Sobrellano. The university was originally created as a seminary, sponsored by the First Marquis of Comillas. It is one of the most prestigious universities in Spain. The Caprice which was designed by Gaudi the famous Spanish architect. We decided not to pay to see the interior. El Duque is a 19th century English style building. It was closed for renovations. Near to El Duque is a statue of the First Marquis which was erected as homage to him for the great benefit he brought to Comillas. From the statue of the First Marquis we could see an impressive cemetery that is in the ruins of a gothic church overlooking the sea. The Iglesia de San Christobal dates back to 1617 and is next to the Corro Campios which is the main square in Comillas. We spent an enjoyable couple of hours wandering around Comillas and then returned to our apartment. 9 June 2024 - Suances We woke up to rain so we had a quiet morning in the apartment. In the afternoon the rain stopped for a while and we went for a walk along the seafront below Suances. We didn't do very much today but after 10 weeks of travelling we were happy to relax in our comfortable apartment. 10 & 11 June 2024 - Drive to Santander & Ferry to Plymouth We had to check out of the apartment at 11.00 and then drove 30 minutes to the ferry terminal in Santander. The ferry was only sailing to Plymouth at 18.30 but they checked us in and we were allowed to leave the car at the terminal while we walked around Santander. We were pleasantly surprised with Santander. A large part of it was destroyed by fire in 1941 and we expected a lot of ugly modern buildings. However, there were a number of elegant buildings and Santander is a pleasant town in a beautiful setting. As we walked along the waterfront we saw our ferry arrive so we walked back to our car. There is a shop at the port which sells booze and I bought 12 bottles of wine for about Eur 10 a bottle. Two of the assistants informed me that one of the wines I bought was served in the Vatican. A good sales pitch! The ferry sailed on time from Santanderand it was much fuller than when we came over to Spain in April. We had our own cabin again and it was a pleasant crossing as the sea wasn't rough. We arrived on time but for some reason they left us stuck in our cars for an hour before we could disembark. It has been a very good 10 week road trip. Overall we were very lucky with the weather as it wasn't too hot, cold or wet. Our 10 year old car behaved very well on the 5,500 miles trip and the only issue was that the air con needed re-gassing. Links to other Blogs about our Road Trip from England to Morocco Week 1 - Salamanca, Toledo, Cordoba & Granada Week 2 - Spain to Morocco Week 3 - Southern Morocco Week 4 - Marrakesh to Todra Gorge Week 5 - Todra Gorge - Merzouga - Fes - Chefchaouen Week 6 - Morocco to Cadiz & Seville Week 7 - Seville to Portugal Week 8 - Porto to Pontevedra, Spain Week 9 - Muxia & the Lighthouse Way Day Hikes on Spain's Lighthouse Way
- Muxia & Lighthouse Way Trek - Week 9
View on the Lighthouse Way Trek Contents 30 May 2024 - Stage 6 of the Lighthouse Way 31 May 2024 - Stage 8 of the Lighthouse Way 1 June 2024 - Day Trip to A Coruña 2 June 2024 - Stage 5 of the Lighthouse Way 3 June 2024 - Muxia & outing to Muros 4 June 2024 - Stage 7 of the Lighthouse Way 5 June 2024 - Stage 4 of the Lighthouse Way Links to other Blogs about our Road Trip 30 May 2024 - Stage 6 of the Lighthouse Way Trek It was a short 2 hour drive northwards from Pontevedra to Muxia. When we arrived at midday it was only 17 degrees centigrade and there was a very strong and chilly wind. We had enjoyed temperatures of 27 degrees centigrade in Pontevedra yesterday. We rented a 3 bedroom apartment in Muxia through Booking.com for only Eur 474 for a week. We have a bit of a sea view and we were very pleased with the apartment. The first thing I did was put on the heating as Muxia was so cold! We were spending a week in Muxia to do several sections of the 8 day Lighthouse Way trek as day hikes. This afternoon we wanted to do part of stage 6 of the Lighthouse Way trek. It is the longest section of the trek and it takes about 10 hours. We certainly didn't have time to do the whole stage! Much of stage 6 of the Lighthouse Way trek is along main roads and through forests and towns which doesn't appeal to us. We like paths through open countryside so we can enjoy views. We therefore decided to do the last part of stage 6 which runs much closer to the sea than the first part. We needed to take a taxi to Leis beach and then walk about 10 kilometres back to Muxia. There are about 7 taxi drivers in Muxia and one of them is Mathew Smith who is a Brit living in Muxia. I gave Mathew a call as we were apprehensive about communicating with Spanish taxi drivers. He agreed to pick us up in the afternoon. The weather improved in the afternoon, although it was windy, and it was a very pleasant 2.5 hour walk. It did involve some walking along roads and forests. However, the roads were very quiet rural roads and the forests were natural rather than plantations. In the evening we had a meal at Bar O Porto on Muxia's seafront. Mathew had recommended it but had warned us that the young waitress rarely smiled. Mathew was right as the food was good and the waitress didn't smile! See my blog Day Hikes on the Lighthouse Way for information on planning hikes on the Lighthouse Way. 31 May 2024 - Stage 8 of the Lighthouse Way Trek Last night I called Mathew to arrange for him to take us to Lires Beach in the morning and collect us from Finisterre in the late afternoon. This would enable us to do a lot of stage 8 of the Lighthouse Way trek. The entire stage 8 of the Lighthouse Way trek is 27 kilometres long and takes about 9 hours. We planned to do 17 kilometres of it. This meant cutting out the road section from Nemina to Lires Beach at the start and an uphill section to Finisterre lighthouse at the end. The coastal scenery was fantastic but it was a hard 6 hour hike with several hills to walk up and down. Fortunately the strong wind was behind us and the weather was sunny and warm. We were pleased that we hadn't attempted to do the complete section. The path was very quiet and we only passed one couple, and a woman walking on her own, coming the other way. That's the way I like it! Just before we reached Finisterre I called Mathew and he came to collect us. It cost Eur 57 for the taxi there and back which was worth it, enabling us to do a beautiful hike that wasn't excessively long. See my blog Day Hikes on the Lighthouse Way for information on planning hikes on the Lighthouse Way. 1 June 2024 - Day Trip to A Coruña The sunny and dry weather continued today and the weather forecast is good for our entire week in Muxia. If so we are really lucky as Galicia isn't renowned for good weather! We took a break from hiking today and drove one hour north to the large town of A Coruna to do some sightseeing. We parked at Aparcadoiro Palexco which has plenty of large parking spaces, toilets and is very close to A Coruna's historic centre. We had lunch and then spent an hour wandering around A Coruna's old town. It is very pleasant but there isn't an awful lot to see. Afterwards we drove over to the nearby Torre de Hercules. This is a Roman Lighthouse dating from the second century which was restored and re-clad in the late 18th century. It was closed when we got there but it is in a very nice position and there are good views from the base. There is a free car park at the Torre de Hercules and also free parking on the street. 2 June 2024 - Stage 5 of the Lighthouse Way Trek Mathew drove us to Arou in the morning so we could walk to Camarinas on stage 5 of the Lighthouse Way trek. This is the most scenic section of the 8 day trek. It is 24 kilometres long and has had the most shipwrecks. It is known as the Coast of Death (Costa de Al Muerta). We shortened the hike a bit by asking Mathew to drop us off at Lobeiras viewpoint which is 1.7 kilometres past Arou. It was then a beautiful 6 kilometre walk to the English Cemetery where 142 of the bodies recovered from the HMS Serpent were buried. The cemetery also commemorates the death of sailors from 2 other British vessels that ran aground in the 19th century. HMS Serpent reached this stretch of coast in November 1890 2 days after leaving Plymouth. It was carrying 176 crew members. Sadly the ship ran aground in thick fog and only 3 crew members survived. Shortly after the English cemetery the coastal path changed to a little used coastal road leading to the Vilan lighthouse. We followed it most of the way but cut out the final steep climb up to the lighthouse. By now the wind was ferocious and it would have been even worse at the lighthouse. We had intended to phone Mathew to have him pick us up from Lago Beach which is 2.5 kilometres before Camarinas. However, the walk took less time than we had anticipated and Mathew couldn't collect us before 16.30 as he was hosting a lunch party. We therefore walked to Camarinas and called him from there. The hike took about 6 hours in total and it wasn't too tiring as there weren't many hills. In the evening we tried another restaurant that Mathew had recommended. It is called the A Marina and is very popular. We had a good seafood dinner and the staff were very pleasant and smiled! See my blog Day Hikes on the Lighthouse Way for information on planning hikes on the Lighthouse Way. 3 June 2024 - Muxia & outing to Muros The wind was much calmer so we explored Muxia in the morning. Muxia is an attractive small town on a headland and we really liked it. We walked to the end of the headland where there is a church and lighthouse. Just above the church there is a granite sculpture called A Ferida (The Wound). The sculpture was donated as a tribute to the volunteers who helped the Galician people when the Prestige Oil spill occurred in 2002. The MV Prestige was carrying 77,000 tonnes of heavy fuel oil in a heavy storm when it sank and spilled an estimated 60,000 tonnes of oil. In the afternoon we drove south along the coast from Muxia to the small town of Muros. The drive wasn't as scenic as I hoped as we didn't have many views of the coast. It was very hot in Muros and if we had brought our swimming gear we would have gone to the beach. Instead we walked around Muros's small historic centre in the heat. The only sight is really the Church of Santa Maria which has a wooden ceiling is in the shape of an inverted ship's keel. 4 June 2024 - Stage 7 of the Lighthouse Way Trek Mathew drove us to the tiny coastal settlement of Talon near Nemina Beach so we could walk to Muxia on stage 7 of the Lighthouse Way trek. The Lighthouse Way trek goes from the north to the south but we reversed the direction of this stage so we could finish the walk at our apartment. There had been a very strong northerly wind for several days. As we hadn't wanted to walk into the wind we left this stage until the wind had calmed down. Stage 7 of the Lighthouse Way trek is 25.3 kilometres long and is meant to take about 9.25 hours. It involves ascending 750 metres in one section plus other hills. I decided to make it more enjoyable by taking a few short cuts where possible. This reduced the distance by about 8 kilometres. It turned out to be our least favourite section of the Lighthouse Way trek as there weren't good views of the coast for half the walk. Also there were boggy sections and a lot of the walk was on overgrown paths with gorse and brambles scratching us. On the way we met a young British guy walking towards us. He warned us that his wife had been attacked by a dog whilst taking a short cut to avoid walking around a headland. His trek had been organised by an agency and they had arranged for a taxi to take his wife to a doctor. We were very surprised that he hadn't gone with her! We are very nervous of dogs so we abandoned our plan to bypass the headland as the dog was running wild on the road. We could hear it barking in the distance. The scenery on the headland was beautiful so it was a good decision. The hike took us about 7.25 hours and we were very tired. It was a hot day and there was little wind. Sometimes the wind is beneficial! See my blog Day Hikes on the Lighthouse Way for information on planning hikes on the Lighthouse Way. 5 June 2024 - Stage 4 of the Lighthouse Way Trek Fog was forecast f or today. It was fo ggy when we woke up but fortunately it soon cleared. I was planning to drive 23 kilometres to Arou, take a local taxi to Laxe and then walk back to Arou on stage 4 of the Lighthouse Way trek. However, there are very few taxi drivers in Laxe and Arou and we didn't relish communicating with them in Spanish. I therefore called Mathew again and arranged for Lani to travel in his car to Arou and for me to follow him in our car. Due to the local law Lani had to be in the taxi. I then parked our car in a free car park in Arou and Mathew drove both of us to Praia dos Cristais near Laxe. It turns out that it was Matthew who had taken the woman to the doctor yesterday. He told us that the dog was indeed very aggressive and the wife was badly shaken up by it all. He also found it bizarre the husband didn't stay with her! This was the last time we would be using Mathew and we were sad to say goodbye. He was very good company and very knowledgeable and informative. We had spent several hours chatting to him over the last week. If you go to Muxia I highly recommend him. His telephone number is 34 683 36 24 65. Stage 4 is the easiest section of the Lighthouse Way trek as it is only 18 kilometres long and there is very little elevation. We cut out the first 2.8 kilometres of the hike and in total the hike took us 5.25 hours. It was a much more scenic hike than yesterday's hike. The terrain was also easier except near the end when the trail goes through an interesting boulder field. See my blog Day Hikes on the Lighthouse Way for information on planning hikes on the Lighthouse Way. Links to other Blogs about our Road Trip from England to Morocco Day Hikes on the Lighthouse Way Week 1 - Salamanca, Toledo, Cordoba & Granada Week 2 - Spain to Morocco Week 3 - Southern Morocco Week 4 - Marrakesh to Todra Gorge Week 5 - Todra Gorge - Merzouga - Fes - Chefchaouen Week 6 - Morocco to Cadiz & Seville Week 7 - Seville to Portugal Week 8 - Porto to Pontevedra, Spain Week 10 - Muxia, Spain to Plymouth, UK
- Porto to Pontevedra, Spain - Week 8
Porto Contents 23 May 2024 - Porto 24 May 2024 - Porto 25 May 2024 - Porto 26 May 2024 - Porto to Pontevedra, Spain 27 May 2024 - Pontevedra 28 May 2024 - 28 May 2024 - Day Trip to Santiago de Compostela 29 May 2024 - Day Trip to Vigo Links to Other Blogs on our Road Trip 23 May 2024 - Porto We took an Uber into Porto today and it cost Eur 7, which isn't much more than 2 tickets on the metro would have cost. We first visited the 12th century Porto Cathedral which the Rough Guide said wasn't very special. The entry fee was Eur 5 and it was worth it. There was a lot to see and there were good views from the tower. Our next stop was the Sao Bento train station! It is a tourist attraction as it has historic scenes made from 22,000 blue ceramic tiles. We had lunch at Cafe da Gina on the upper floor of the Mercado de Bolhao. The food was excellent and it was so much cheaper than restaurants in tourist areas. They have very good reviews on Tripadvisor . We walked over to Porto city hall and about 20 people were patiently waiting for their turn to pose in front of the Porto sign! The avenue leading down from the City hall was lined with interesting buildings. We paid a Eur 5 entrance fee to visit the interesting church of Carmo. It was built for monks and is very ornate. The entrance fee also covered the Carmelita nunnery which is now a museum. The Church and the Nunnery are separated by probably the narrowest house in Portugal, barely 1 metre wide. This house was built as churches couldn't share the same wall. As we had plenty more time in Porto we called it a day and took an Uber back to our apartment. We were impressed with Porto and preferred it to Lisbon. 24 May 2024 - Porto We took an Uber from our apartment to the beach area of Porto. From there we walked for about 1.5 hours to the centre of Porto along the Atlantic coast and the Douro river. It was a sunny day but there were only a few people on the beaches. We had a quick lunch and then continued walking along the river to the old Ribiera area on the waterfront of Porto. It was very lively and it is one of the most popular areas of Porto for visitors. We walked across the lower deck of the Ponte Luiz I bridge to the south side of the Douro which is known as Gaia. It is another busy and popular water front area as there are excellent views across the river to the historic centre of Porto. There is a cable car (Teleférico) which goes along Gaia's waterfront up to the upper deck of the Pont Luiz 1 bridge. We took the cable car despite the Eur 7 charge being a bit expensive for a 5 minute ride. 25 May 2024 - Porto We had a more relaxed day today and took an Uber to the Crystal Palace gardens in Porto. Porto's Crystal Palace was modelled on London's Crystal Palace but the original structure has been replaced by a modern dome shaped building. It is possible to walk on top of the dome but it costs an extortionate Eur 10. The Crystal Palace gardens are worth seeing. The views over the city and the river are the best feature. There were lots of peacocks, peahens and cockerels strutting their stuff. We walked into the historic centre of Porto from the Crystal Palace gardens and wandered around. A couple of days ago we had come across a long queue of people waiting to get into the Livraria Lello bookstore. We didn't know why at the time but this bookstore is said to have inspired JK Rowling when she lived in Porto before writing Harry Potter. Apparently she frequented the bookstore. Lonely Planet ranks it as the world's third most beautiful bookstore. I have seen photos of the Livraria Lello bookstore and it is impressive. However, I wouldn't go to the hassle of buying an online ticket for Eur 8 and queuing to enter a bookstore crowded with Harry Potter fans. I'm not a fan! We later passed the Majestic Cafe which also had queues to enter. It turns out that it was a popular hangout for JK Rowling. 26 May 2024 - Drive from Porto to Pontevedra, Spain We drove 170 kilometres from Porto to Pontevedra in Spain. We visited Ponte de Lima and Valencia do Minho on the way to Pontevedra. Both towns were on our route and were worth visiting according to the Rough Guide book. We also couldn't check into our next apartment in Pontevedra until 17.00 and therefore needed something to fill in the time! Ponte de Lima is one of the oldest towns in Portugal and is on the River Lima. Ponte de Lima is an attractive town but doesn't have any real sights. There was plenty of safe and free parking at the " Parque Estacionamento - Expolima ". It was a Sunday and Ponte de Lima's centre was busy with Portuguese visitors and locals strolling around. We walked over the old 14th century bridge to the Parque do Arnada and then strolled around the town centre and the riverside. After lunch at Ponte de Lima we drove the short distance to Valenca do Minho. Its old town is within 13th century fortifications. We drove through several narrow gateways to park inside the walls at " Parking Fortaleza ". It wasn't free but it seemed secure which was important as we had our luggage in the car. The Rough Guide made out that Valenca do Minh would be swarming with tourists and being a Sunday I feared the worst. Fortunately there weren't many visitors and we spent a pleasant hour wandering around Valenca do Minh's historic centre. We reached Pontevedra at 17.00 and checked into a very modern 1 bedroom apartment that we had booked through Booking.com for Eur 71 per night. We will be staying 4 nights in Pontevedra. 27 May 2024 - Pontevedra The weather in Galacia isn't usually good but we woke to sun and the weather forecast is good for the next week. It was only a 10 minute walk along the river from our apartment to the historic centre of Pontevedra. It was surprisingly quiet in Pontevedra but that may have been because it was a Monday morning. The centre of Pontevedra is a very pleasant place to wander around but there aren't many sights. We visited t he convent of San Francisco, which was founded by St Frances of Asissi, and entry was free. We also visited the Basilica of Santa Maria Mayor, a 16th century Roman Catholic church. The interior was plain but beautiful. It was free to enter the church but we paid Eur 1 to climb up the bell tower We entered the Church of the Pilgrim (Igreja de la Peregrina) and again entry was free. The church's scallop shell shape is thought to indicate that it was intended for use by the pilgrims on the road to Santiago. We had problems finding any restaurants open for lunch and it seems that Mondays are a very quiet day. We had lunch at an Indian restaurant as we couldn't find any other open restaurants. However, on the way back to our apartment we saw that there were 2 or 3 restaurants open in the Plaza da Lena. We had spent about 4 hours walking around the centre of Pontevedra and had seen everything there was to see. 28 May 2024 - Day Trip to Santiago de Compostela We drove 40 minutes from Pontevedra to Santiago de Compostela today. I am very conscious that car parking in Spain can be very difficult. I therefore always research car parking beforehand and had found 2 car parks that were near the centre and had good reviews. We tried the cheaper " Parking Municipa Belvis " first but unfortunately it was full and after circling around a few times we gave up. Luckily there was plenty of space at the " Continental Aparcadoiro " and the parking spaces were reasonably wide. It didn't break the bank as 4 hours cost about Eur 8. The main site in Santiago de Compostela is the cathedral and we headed straight there. Four squares surround the cathedral and each square provides a different perspective of the cathedral. Obradoiro square is the largest of the four squares surrounding the cathedral. The Hostel of the Catholic Monarchs adjoins the square. It was founded in 1499 to house pilgrims and is now a Parador. Raxoi Palace is also on the square and was built in 1766. It was originally used as a seminary and is now the City Hall. The smallest of the 4 squares is Platerías Plaza which has the baroque Casa Cabildo, which was built in the 18th century. In the centre of the square is the Fountain of Horses. The Plaza da Quintana is flanked by the Monastery of San Martino. It was founded in the 10th century to house monks overseeing the relics of Santiago. It is the second largest monastery in Spain covering 20,000 square metres. Visitors aren't allowed to enter. We entered the cathedral to which entry is free. It was full of pilgrims, people who have hiked the Camino and other visitors. There was a long queue to see the bones of St James in the crypt and to go behind the high alter. We didn't do this as the queue was too long. We had lunch at the Mercado de Abastos as its sea food restaurants have a good reputation. Lani ordered octopus for Eur 20 and was given a whole one which was a very large portion. I ordered a dish of scallops costing Eur 20 and got ten very small ones! As I was still hungry and I ordered a octopus for myself! 29 May 2024 - Day Trip to Vigo We drove along the coast to Donon which is south west of Pontevedra. Most of the coast around Pontevedra has been spoiled by development. However, there is very little development on the very scenic headland at Donon. There was free parking on the coast at Donon and signs showing walks in the area. We decided to walk south to the two lighthouses near Praia de Melide. We initially walked south along a narrow road and after ten minutes turned off onto the coastal path. There was a sign saying "Senda da Costeira" at the turn off. The path went all the way to the lighthouses and it took about an hour. It was a very scenic walk and there are two nice beaches just past the light houses. On the way back we took a quicker dirt track that didn't follow the coast and joined up with the road near the car park. The signboards at the car park showed that there was another interesting coastal walk northwards to an iron age fort. Unfortunately we didn't have time to do it. We then drove to nearby Cangas. We parked the car and took a 20 minute passenger ferry ride across the estuary to Vigo. It was a very modern ferry which runs every half an hour and only costs Eur 2.80 each way There isn't that much to see in Vigo. We had lunch first and then wandered around the older part of Vigo. We were intrigued that there are a series of covered escalators from the lower part of Vigo to the upper town. Links to other Blogs about our Road Trip from England to Morocco Week 1 - Salamanca, Toledo, Cordoba & Granada Week 2 - Spain to Morocco Week 3 - Southern Morocco Week 4 - Marrakesh to Todra Gorge Week 5 - Todra Gorge - Merzouga - Fes - Chefchaouen Week 6 - Morocco to Cadiz & Seville Week 7 - Seville to Portugal Week 9 - Muxia & the Lighthouse Way Week 10 - Muxia, Spain to Plymouth, UK
- Seville to Lisbon, Portugal - Week 7
Sintra, Portugal Contents 16 May 2024 - Seville to Caceres 17 May 2024 - Caceres & Trujillo 18 May 2024 - Caceres to Lisbon 19 May 2024 - Lisbon 20 May 2024 - Lisbon 21 May 2024 - Lisbon 22 May 2024 - Lisbon to Porto Links to other Blogs about our Road Trip 16 May 2024 - Drive from Seville to Caceres It was a lovely sunny morning when we left Seville but the temperature dropped to 14 degrees centigrade as we drove north towards Cáceres. It was a big change from the 31 centigrade that greeted us on Sunday when we arrived in Seville! We stopped off at Merida to visit the Roman Colony that Augustus founded in 25 BC to resettle soldiers who had been honourably discharged from the Roman Army. The main sites at Merida are a Roman amphitheatre and a very impressive Roman theatre. We had bought a combined entry ticket for Eur 8 that covered the theatre, amphitheatre and a few other Roman sites at Merida. The Roman House of Anfiteatro was included in the ticket and we visited it as it was nearby The Roman house was thought to belong to an important family and there were some impressive mosaics. The most famous ones are a mosaic showing three men treading grapes and a mosaic of fish, a symbol of good luck for the house. We drove on to Cáceres. After checking in to the excellent Barceló Cáceres V Centenario hotel we had a pleasant walk around the historic centre of Cáceres. It was founded by the ancient Romans. Cáceres is encircled by 12th century Moorish walls and has a mix of Gothic and Renaissance architecture with cobbled streets. 17 May 2024 - Trujillo We drove 30 minutes from Caceres to visit nearby Trujillo which is the birthplace of Francisco Pizarro who conquered the Inca empire. Trujillo is an unspoilt small historic town with numerous attractive old stone buildings. We parked in an underground car park that had good parking spaces and was cheap. We expected there would be a lot of other visitors at Trujillo but there were very few and fortunately only one group. We spent a very pleasant morning wandering around Trujillo and then drove to Caceres for lunch. We preferred Trujillo to Caceres and it was easier to find our way. 18 May 2024 - Drive from Caceres to Lisbon We drove from Caceres to Lisbon today. We had driven in Spain for 3.5 weeks without paying a single toll for using their good highways. Unfortunately Portugal charges for the use of their highways and it cost Eur 18 to drive 190 kilometres from the border with Spain to Lisbon. We arrived at our apartment in the outskirts of Lisbon at 15.00. That was the earliest we could check in and we were met by the very friendly owner of the apartment. He spent an hour chatting to us and explaining everything about the apartment. We were very happy with the one bedroom apartment that we had booked through Booking.com for Eur 123 per night. It is only a minute's walk away from the metro station and then a 15 minute ride to Lisbon's historic centre. As we had 4 nights in Lisbon we decided not to go into the centre until tomorrow. We did some shopping at the nearby supermarket and bought some delicious chicken from a restaurant for dinner. 19 May 2024 - Lisbon We took the Metro into the centre of Lisbon. We started by walking around Lisbon's main downtown area which is known as the Baixia. This area was built in grid formation after the earthquake in 1755. First we visited Rossio which is one of three squares forming a triangle around the old Baixa area. From there we walked to Arco da Rúa Augusta which is a huge arch adorned with statues of historical figures and acts as a gateway to Lisbon. It was built to celebrate Lisbon's reconstruction after the earthquake. There are hills on both the western and eastern sides of the Baixia. The area on the eastern side is known as the Alfama and we walked up to it after seeing the Baixia area. It was a Sunday and there were quite a number of Portuguese and foreign tourists. The Castle is the top tourist attraction in the Alfama and when we reached the castle there was a long line up at the ticket office. Tickets cost a whopping Eur 15 and we decided not to enter! There isn't much to see at the castle anyway and it is mainly visited for the views of Lisbon and to wander around the grounds. We went back to Baixia for lunch. As we were walking I felt someone touch my back pack and immediately turned around. There were two guys behind me and I think they had tried to open the top zipper as I found it partially open. Luckily my back pack is very old and the zip often jams. We had lunch at a restaurant in one of the more touristy streets in Lisbon. When I asked for the bill they asked me to go inside to pay. They then told me that their credit card machine wasn't working and I had to pay cash. Instead of giving me a printed bill I was shown the bill on a mobile phone. The amount was much more than I expected. Upon close examination it was because they charged an extra Eur 3 for each of our main courses and had also added an Eur 5 service charge. I got them to reduce the bill by Eur 11 for these items. I am sure they tried to scam us and the waiter deliberately didn't want us to pay by credit card so he could keep the amount over charged. This is the first time we have had such an issue on our road trip. 20 May 2024 - Lisbon We took the metro into Lisbon and explored the Biarro Alto area. We wanted to go up the hill on the Elevador de Bica, a funicular railway built in 1892, but it wasn't working so we walked instead. We then wanted to visit the Church of Sao Roque but that was closed! The Convent and Archaeological museum do Carmo was open! It was once Lisbon's greatest church and was built in the 14th century. It was badly damaged in the earthquake of 1755 and never rebuilt. Among the items displayed in the museum were an Egyptian sarcophagus dating back to 3rd century BC and 2 Peruvian mummies. Afterwards we took a 40 minute train ride along the coast to Cascais where we had a good lunch of seafood. We walked back to Estoril along the esplanade before catching the train back to Lisbon. 21 May 2024 - Sintra We went on a day trip from Lisbon to Sintra today. We would have driven the half an hour there but I had read on the internet that cars often get broken into in Sintra. I thought our UK registered car would be particularly vulnerable. We therefore went by train and it took about an hour. Sintra has Unesco World Heritage status and it's famous for its Moorish Castle, palaces and country estates. I had pre-booked tickets on the internet for two of the palaces and the castle. We first visited the Palacio Nacional which is in the actual town of Sintra. The palace dates back to the 14th century and has some very impressive rooms. The exterior is less impressive except for the 2 chimneys that provided ventilation for the kitchen. It wasn't too busy but we did keep bumping into 2 noisy groups. The next 2 sites were high up on a hill above Sintra so we had lunch in Sintra before visiting them. We could have taken a bus up the hill but it is slow and expensive. We also could have walked up but it would have been a 40 minute uphill slog with hardly any views. We ended up taking a taxi for only Eur 7 more than the bus would have cost. We had bought tickets for the gardens and terraces of the Palacio de Pena which was built in the 1840's. We didn't buy tickets for the interior as Tripadvisor reviews stated it was very crowded and there was little to see. The Palacio de Pena looks as if it should be in a Disney Park. It is the top attraction in Sintra and there were crowds of tourists there. The park was disappointing as it consisted of woodland. However, the views of the Palace and the views from the wrap around terraces made the visit worthwhile. Afterwards we walked 20 minutes down to the Castelo dos Mouros ( Castle of the Moors). It was built in the 9th century and captured from the Moors in 1147. It was much quieter than Pena Palace and we walked along, and up, the ramparts to 2 towers. We could have also visited the Quinta da Regaleira estate, the Monserrate Palace and the Convento dos Capuchos in Sintra. However, we had seen enough for one day. We walked half an hour down to Sintra and took the train back to Lisbon. 22 May 2024 - Drive from Lisbon to Porto We drove 3.5 hours from Lisbon to Porto and paid Eur 23 in toll fees. It seemed very expensive after driving on the free highways in Spain. Petrol also costs more in Portugal than in Spain and the UK. We had booked a 3 bedroom apartment in the suburbs of Porto for Eur 102 through Booking.com . We were met by the owner who was was very helpful. He spent an hour going through the apartment with us and telling us what to see in Porto. We decided to leave visiting the historic centre of Porto until tomorrow. Links to my Blogs about our Road Trip from England to Morocco Week 1 - Salamanca, Toledo, Cordoba & Granada Week 2 - Spain to Morocco Week 3 - Southern Morocco Week 4 - Marrakesh to Todra Gorge Week 5 - Todra Gorge - Merzouga - Fes - Chefchaouen Week 6 - Morocco to Cadiz & Seville Week 8 - Porto to Pontevedra, Spain Week 9 - Muxia & the Lighthouse Way Week 10 - Muxia, Spain to Plymouth, UK
- Spain to Morocco Road Trip - Week 2
Essaouira, Morocco Contents 9 April 2024 - Granada to Ronda, Spain 10 April 2024 - Ronda, Spain 11 April 2024 - Ronda to Arcos de la Frontera, Spain 12 April 2024 - Arcos de la Frontera to Algeciras, Spain 13 April 2024 - Algeciras to Asilah, Morocco 14 April 2023 - Asilah to El Jadida, Morocco 15 April 2024 - El Jadida to Essaouira, Morocco 16 April 2024 - Essaouira, Morocco Links to other blogs about our road trip 9 April 2024 - Drive from Granada to Ronda, Spain We drove from Granada to Ronda and stopped on the way to walk the Caminito del Rey which is a walkway attached to the walls of a steep and narrow gorge. It was finished in 1905 and it took 4 years to construct. T he Caminito del Rey was built to provide access for the workers at the hydro electric power plant. The original path for the Caminito del Rey was constructed of concrete and steel. It deteriorated over the years and the concrete collapsed in numerous sections. Several hikers died on the old walkway and in 2015 a new walkway was opened. The Caminito del Rey is an easy walk with great views but it has become extremely popular and commercialised. You have to buy tickets for specific start times and most of the tickets for the Caminito del Rey are for guided walks with a group. We didn't want to walk with a group and I only just managed to buy tickets online for doing the Caminito del Rey on our own. There were a lot of people doing the group walks. We paced ourselves so that we slotted in between two large groups on guided tours and managed to enjoy most of the Caminito del Rey in peace. We arrived in Ronda at 18.00 and checked into a 3 bedroom duplex apartment. It was very spacious and comfortable and only a 10 minute walk to Ronda's historic centre. There was also free off the road parking. We booked the apartment through Booking.com and paid Eur 235 for 2 nights. 10 April 2024 - Ronda, Spain In the morning we walked around Ronda which is probably the most well known and popular White Town (Pueblo Blanco) in Andalusia. Ronda is perched on a massive rocky outcrop straddling a deep gorge. Ronda was one of the last Moorish strongholds to fall to the reconquest in 1485 because of its impregnable position. We walked across the Puente Nuevo (New Bridge) to reach Ronda's old town. The bridge was completed in 1793 and was the world's highest bridge until it was surpassed by a French bridge in 1839. There is a chamber inside the bridge that was used as a prison. During the civil war both sides used the prison as a torture chamber for captured opponents. Some prisoners were thrown to the rocks at the bottom of the gorge. Our first stop in Ronda was to the cathedral of Santa Maria la Mayor. It was built on the site of a 13th century mosque. The original Minaret and Mihrab of the mosque still stand. Afterwards we visited the nearby 14th century Palacio de Mondragon which was probably the palace of the Moorish kings. In the afternoon we drove from Ronda to 3 other White Towns. They are fortified hilltop towns and all the buildings are painted white. We first stopped at Setenil de las Bodegas. The main sights were the castle and the houses built into the cliffs. We then drove through beautiful countryside to Olvera and climbed up to the fort. The last white town was Zahara de la Sierra with its fort perched high above. We decided not to climb up to it as it was hot and getting late. 11 April 2024 - Drive from Ronda to Arcos de la Frontera, Spain We left Ronda at 11.00 in beautiful sunshine and fortunately the air conditioning was working as it got to 28 centigrade today! We were heading for Arcos de la Frontera which is another White Town. We reached Arcos de la Frontera at 14.00. I had booked a 2 bedroom apartment with parking through Booking.com for Eur 72. We opted to have a rest at the apartment, to avoid the heat of the day, before heading off to see the sights. We paid to enter the church of Santa Maria de la Asunción and climbed up its bell tower. It was built in the 15th century on the remains of a former Moorish mosque. There is a castle on the same square as the church. It was built as an Arab fortress but became the residence of the Duke of Arcos after the Reconquest and remains in private hands. It isn't possible to visit it. We then continued walking along the main street of Arcos de la Frontera past a convent and the church of St Peter to a Mirador. The views from the Mirador weren't very good and unfortunately the better Mirador by the castle was closed due to construction. For supper we bought a whole grilled chicken, chips and salad and ate it in our apartment. 12 April 2024 - Drive from Arcos de la Frontera to Algeciras, Spain It is only a 1.25 hour drive from Arcos de la Frontera to Algeciras. We stopped off at Medina Sedonia on the way. It's a reasonable sized White Town and its medieval walls, the Church and the Alcazar (fort) are the main historic sights. Unfortunately the Alcazar isn't open to visitors. In Algeciras we stayed at the Hotel AC Algeciras which is a Marriott Hotel. It cost a very reasonable Eur 70 and was only 10 minutes drive from the ferry port. 13 April 2024 - Algeciras to Asilah, Morocco We got up early at 06.15 to catch the 09.45 ferry to Tangier Med as our tickets stated we had to be at the port of Algeciras 2 hours before departure. As I suspected this wasn't really necessary and a few cars arrived only 30 minutes beforehand. I had read that the ferries were often late and I was therefore pleased to see that our ferry was at the port. However, the ferry only sailed at 10.30 despite the ferry not being very full. We had a good view of Gibraltar as we left Algeciras and soon afterwards had a view of the coast of Africa. It took 1 hour 45 minutes to reach the port of Tangier Med which is 40 kilometres from the city of Tangier. It took us over an hour to clear customs as all cars were being X-rayed by a large machine mounted on a track. If this is done in the peak season there will be chaos. We then spent another hour buying 3rd party car insurance and obtaining Moroccan SIM cards and dirhams. At the port a lady representing the Inwi telecom company tried to sell us a very expensive SIM card and data package for Eur 60. I knew it should be a lot cheaper and declined. Fortunately the car insurance agency sold SIM cards with 7.5 GB of data and they only cost Eur 10! As we needed 2 SIM cards it was a big saving. I had reserved a very nice hotel room in Asilah through Booking.com for Eur 48. Asilah is south of Tangier on the Atlantic coast and was only an hour's drive away from the port of Tangier Med. It was an easy drive on a toll highway and a good introduction to driving in Morocco! After checking into our hotel we walked to Asilah's interesting medina. The Medina is largely residential with white houses decorated with lots of vivid blue. It is surrounded by sturdy fortified walls built by the Portuguese in the 15th century. There are two main gates and several towers spread along the walls. We had dinner at a local fish restaurant outside Asilah's medina's walls. We both had mixed platters of seafood and chips and it only cost Eur 8 per platter. 14 April 2023 - Drive from Asilah to El Jadida, Morocco We drove southwards from Asilah to El Jadida on the toll road. Google Maps estimated that the journey would take 4 hours but it actually took 6 hours. The toll road was very busy between Rabat and Casablanca and there weren't enough lanes open at the frequent toll stations. Police were everywhere, particularly on the bridges crossing the toll road where there were usually 4 policemen monitoring the traffic. El Jadida is on the Atlantic coast and was founded by the Portuguese in the early 16th century. In the late afternoon we walked from our apartment hotel along the sea front to the Portuguese fortress. There is a long sandy beach, which is very popular with Moroccans, but it didn't look very appealing to us. We got to the fortress's ramparts at 17.50 just as they were closing the access to the walkway along the top of them. The ramparts were meant to be open up to 18.00. The only other attraction in El Jadida was the famous Portuguese cistern but it has been closed for a few years due to structural issues. It is likely to remain closed for a long time due to the lack of funds for restoration. We walked around El Jadida's fort but it was neglected and dirty. Unfortunately our 1 bedroom apartment had also seen better days. We wished we hadn't stopped off at El Jadida! 15 April 2024 - Drive from El Jadida to Essaouira, Morocco We drove from El Jadida to Essaouira today, relieved that the car's air conditioning was working as the outside temperature hit 35 centigrade! The first part of the journey was along toll roads which were so much quieter than yesterday. It seems that many people had visited family at the end of Ramadan and were making their way home yesterday. After a while the toll road ended and we drove on public roads through bustling towns. I had to drive very carefully as people, carts pulled by donkeys, motor bikes etc were all over the road. The scenery was much more arid and rural than it had been coming down south from Tangier to El Jadida over the past two days. We passed sheep farms and farmers were ploughing their fields using horses. There were lots of carts being pulled by horses and donkeys. Essaouira is on the Atlantic coast and it was a bit cooler because of a breeze. Strong trade winds make its crescent shaped beach popular with wind and kite surfers. We had a quick walk around Essaouira's medina in the late afternoon. We have 2 nights in Essaouira and have plenty of time to explore. We stayed in a 2 bedroom apartment which we had booked through Booking.com for Eur 61 per night. We were very pleased with it as it was a modern apartment, quiet and a pleasant 10 minute walk to Essaouira's medina. 16 April 2024 - Essaouira, Morocco In the morning we walked along the promenade to Essaouira's harbour. It was absolutely packed with fishing boats and there were a lot of stalls selling an interesting variety of fish. We wanted to visit the bastion at the harbour as it has a good view of Essaouira. However, they charge an entrance fee of Eur 5 which is far too much. Instead I took photos of Essaouira from the nearby beach. After that we spent a few hours wandering around the medina. Essaouira's medina has a mixture of restaurants, art galleries, tourist shops, hotels and homes. It is an interesting medina with good facilities and no hassles. I can understand why Essaouira is very popular with foreigners. Links to other Blogs about our Road Trip from England to Morocco Week 1 - Salamanca, Toledo, Cordoba & Granada Week 3 - Southern Morocco Week 4 - Marrakesh to Todra Gorge Week 5 - Todra Gorge - Merzouga - Fes - Chefchaouen Week 6 - Morocco to Cadiz & Seville Week 7 - Seville to Portugal Week 8 - Porto to Pontevedra, Spain Week 9 - Muxia & the Lighthouse Way Week 10 - Muxia, Spain to Plymouth, UK
- Road Trip in Southern Morocco - Week 3
Contents 17 April 2024 - Essaouira to Agadir 18 April 2024 - Agadir to Sidi Ifni 19 April 2024 - Sidi Ifni to Tafraoute 20 April 2024 - Ait Mansour Gorge nea r Tafraoute 21 April 2024 - Tafraoute to Taroudant 22 April 2024 - Taroudant and Tioute 23 April 2024 - Taroudant to Marrakesh Links to other blogs about our Road Trip 17 April 2024 - Drive from Essaouira to Agadir It took just over 3 hours to drive south from Essaouira to Agadir. Agadir is a large resort town on the Atlantic coast and it is popular with foreigners seeking winter sun. We drove through misty weather which thickened into a sea mist by the time we arrived in Agadir. It was only 20 centigrade in Agadir whereas it had reached 31 centigrade further inland on the drive down. In 1960 Agadir suffered the most destructive and deadly earthquake in Moroccan history. Most of the city was destroyed and about 15,000 people died. Agadir was rebuilt in the 1960's and only the beach is of interest to tourists. We therefore only stayed for a one night in Agadir to break up our journey southwards. We had booked a 2 bedroom apartment at an Agadir hotel through Booking.com for Eur 59. The staff were very helpful and gave us a quiet room as requested. The apartment was better than expected. It took us 10 minutes to walk from the apartment to Agadir's beach. Even though the weather was misty the beach seemed very nice. There is a huge expanse of sand and lots of Moroccans were playing soccer on the beach. We walked for about half an hour along the beach to have a meal at a restaurant on the esplanade. The weather started to clear in the evening and we hoped that the next day's weather would be better. 18 April 2024 - Drive from Agadir to Sidi Ifni Fortunately the weather improved and we continued our drive southwards to Sidi Ifni. It was mostly dual carriageway as we left Agadir but there were far too many roundabouts. Agadir sprawls out in a messy development. It took about an hour to get out of this very poorly planned area of Agadir. We stopped off for lunch at the seaside town of Aglou Plage. Sadly it has been ruined by overdevelopment as there is a mass of ugly holiday accommodation for Moroccan holidaymakers. My old Lonely Planet guidebook described the next 40 kilometres of coast from Aglou Plage to Mirleft as "exceptionally picturesque". The coastline didn't seem very special to us and there was ugly development on sections of it. Twenty years ago Mirleft had a "totally undeveloped beach" according to Lonely Planet but now Mirleft is a large and ugly resort town. We were relieved to find that Sidi Ifni has retained its character. Spain was given Sidi Ifni by treaty after the Spanish-Moroccan war of 1859, which Morocco lost. Spain didn't take full possession of Sidi Ifni until 1934 and most of the buildings only date back to then. Spain handed Sidi Ifni back to Morocco in 1969. There isn't much to see in Sidi Ifni but it is a pleasant and laid back town. It is a popular surfing destination and is also popular with foreign recreational vehicles. There were more than 30 camper vans lined up along the sea front. We couldn't be bothered to swim but did walk along the beach. Afterwards we had dinner at a seafront restaurant and watched the surfers. We stayed at the Logis la Marine Guest House in Sidi Ifni and it cost Eur 86 for their best and newest room on the top floor. It was a really nice room overlooking the sea. We live next to the sea in England but were still surprised at how much louder the waves were here. 19 April 2024 - Drive from Sidi Ifni to Tafraoute We left the coast of Morocco today and headed north east to Tafraoute which is at an altitude of 1,200 metres in the Anti Atlas mountains. Tafraoute is known for its palm groves where almonds and olive orchards grow. Tafraoute is also popular with climbers, hikers and tourists. We were pleased to be heading inland as the scenery on Morocco's Atlantic coast isn't very interesting. We won't see the sea again until we reach the port of Tangier in 2.5 weeks time! I didn't want to repeat yesterday's drive along the more commonly used road between Sidi Ifni and Tiznit. Instead we drove on roads (P1918 and P1916) that weren't on our map but were on Google Maps. The road was good, except for one section, until about 5 kilometres from Tafraoute. Then the road really deteriorated and the surface was badly corrugated. This bad section of road was very scenic. We booked a suite at the Hotel Salama in Tafraoute for Eur 42 a night. The Hotel Salama was very good value for money as we had a living room and a bedroom. It was very central and we could park our car in front of the hotel. 20 April 2024 - Ait Mansour Gorge near Tafraoute It felt surprisingly cool in the morning as it was about 17 centigrade and there was a chilly wind. We drove to the Ait Mansour Gorge which is a 50 minute drive south of Tafraoute. There is a tarred road there but it is narrow in places I parked the car on the road side just before the Ait Mansour Gorge and a woman immediately appeared and said she was a parking attendant. We were pleased to have secure parking even though we would have to tip her. We walked along the narrow road through the best section of the Ait Mansour Gorge. The green oasis at the bottom of the Ait Mansour gorge was a stunning contrast to the pink hills and rocks towering above the gorge. After the Ait Mansour Gorge we continued driving south to the village of Afla Ighir and then had the choice of retracing our steps to Tafraoute or doing a circular route via the Tizerkine gorge. I wasn't sure about the condition of the road through the Tizerkine gorge. However, a Tripadvisor forum report from about a year ago indicated it was driveable in a saloon car. We decided to try the circular route and the road to Tizerkine was excellent. I was surprised that we didn't see any other vehicles and I soon found out why! The condition of the road deteriorated badly as soon as we passed Tizerkine although the scenery was excellent. The road surface alternated between broken up tar and dirt! The road was also very narrow and in several sections it wouldn't have been possible to get past any oncoming vehicles. Luckily there were none! I drove very carefully to avoid damaging our Ford Focus as last year we had broken a front spring in Greece. It was a relief to reach the village of Taghaout where the condition of the road improved. From there it was a pleasant drive back to Tafraoute. The entire drive had taken about 5 hours. 21 April 2024 - Drive from Tafraoute to Taroudant We drove 4 hours from Tafroute to Taroudant in the Sous valley. The first part of our route followed the road to Agadir and then we branched off north-east to Taroudant. The mountain road out of Tafraoute was narrow and just wide enough for 2 cars to carefully pass. There wasn't much oncoming traffic and I slowed down to a crawl for oncoming vehicles as the Moroccan drivers hardly slowed down at all. It was possible to pull off the road but neither myself or the oncoming vehicles wanted to. The scenery on this section was very good. After about an hour the road widened and it was then good all the way to Taroudant. I hadn't been sure about the condition of the road that branched off to Taroudant as it wasn't shown on my map but the road was on Google Maps. We stopped in the countryside for a picnic lunch and there were wild camels everywhere. We eventually joined the main Agadir to Taroudant road. The scenery was bleak and we drove through numerous scruffy developments. I had booked a room at Riad Amnay in Taroudant's medina. A Riad is a traditional Moroccan house built over two or more storeys around a central courtyard which usually contains a fountain. We had been given the location of a nearby parking lot but the challenge was to find it. We had the location on Google Maps but with the one way streets inside Taroudant's city walls it was difficult to locate. A motor bike rider kindly stopped to help us and we followed him to the parking lot. He then walked us to the Riad. I gave him Eur 2 for his help which was probably too much. Riad Amnay was of a high standard and had very good reviews. Lani was very happy with it. However, the rooms in Riads are usually dark as the windows face into the courtyard and I like natural light. Otherwise it was very good. We booked through Booking.com and paid Eur 54 a night. 22 April 2024 - Sightseeing in Taroudant and Tioute We had booked two nights at the Riad in Taroudant. In the morning we drove 40 minutes to the village of Tioute to see the old Kasbah on the hilltop and the oasis below it. On the way we saw several goats in the trees eating leaves. We had read about goats doing this and had wanted to see it. Tioute's Kasbah was a huge disappointment. It was built in 16th century and is described as being magnificent, perched on the hill overlooking the oasis. Sadly, most of the Kasbah is falling to pieces and has been closed off. The only part open was a large restaurant that has been built in the Kasbah and tour groups come for lunch. We then visited Tioute's Oasis which unfortunately is very popular with tour groups. A guy on a motor bike wanted to give us an hour's tour for Eur 15. Eventually we settled on Eur 5 and we followed him in our car to a parking lot by the Oasis. He then told us he wanted Eur 15 and drove off when we didn't agree to it. We were pleased as he had led us to the Oasis and we could wander around by ourselves. It was pleasant but Tioute's Oasis has been spoiled by tourism. The paths through the Oasis are paved. There are a few cafes, handicraft stall and locals offering donkey rides. Not our scene at all and it was a wasted morning When we got back to Taroudant we again had problems finding the parking lot. This time the driver of a Caleche stopped to help us and we followed him to the parking lot. He was a nice man and I gave him Eur 2 for his help. We had lunch in the nearby square and the same Caleche driver came over to say hi. He spoke English and he asked if we wanted a ride in his Caleche around the 7 kilometre long city walls. Apparently Taroudant is referred to as Little Marrakech because of its ramparts. We wouldn't normally ride in a Caleche but we wanted to see Taroudant's city walls and walking around in the heat wouldn't have been fun. We had been told that the fair rate was Eur 10 per hour and that was what he offered. We therefore agreed to meet him at 15.00. We enjoyed the ride and certainly wouldn't have enjoyed walking. Afterwards we wandered around the large under cover market in Taroudant. I buy very little but wanted to buy a leather belt. The asking price was Eur 31! I wouldn't negotiate as he started with an absolute rip off price. In the end I got it for the Eur 5 that I initially offered. 23 April 2024 - Drive from Taroudant to Marrakesh via the Tizi n'Test Pass The fastest route from Taroudant to Marrakesh is on the A3 toll road and it would take about 3.25 hours. However, there is a much more scenic road over the 2,100 metre high Tizi n'Test mountain pass which Google Maps said would take about 5.5 hours. I wanted to drive over the Tizi n'Test pass to see the Atlas mountains even though the road is much more difficult to drive on. Unfortunately it was a hazy day and it spoiled the views on the south side of the Tizi n'Test pass. This area was badly affected by the earthquake of September 2023. Over six hundred thousand people were affected and many are still living in tents and temporary buildings. The road was also damaged by the earthquake. On the south side of the Tizi n'Test pass there were many cracks along the side of the road and pull over areas were cordoned off. On the north side of the Tizi n'Test pass sections of the road surface were badly damaged. A lot of fallen rocks had been cleared to both sides of the road. The first hour of the journey was along the main road east of Taroudant. It is pretty bleak road that goes through messy towns and the scenery isn't great. It is very similar to the main road west of Taroudant which I also disliked. The scenery improved once we turned off the main road and headed north towards the Tizi n'Test pass. Initially it was a very good two lane road. As we got nearer the top of the Tizi n'Test pass it became a one lane tarred road but it was easy and safe to pass other vehicles. Before we reached the top of the Tizi n'Test pass the road surface deteriorated and didn't improve for the next 50 miles! It was very slow going and tiring constantly watching out for potholes. We finally reached Marrakesh after 7 hours of driving and checked into our 3 bedroom apartment in the suburb of Gueliz. We booked it through Airbnb for Eur 75 a night. We were too tired to go into Marrakesh and had 3 nights there anyway. We spent the evening relaxing and did some much needed laundry. Links to other blogs about England to Morocco Road Trip Week 1 - Salamanca, Toledo, Cordoba & Granada Week 2 - Spain to Morocco Week 4 - Marrakesh to Todra Gorge Week 5 - Todra Gorge - Merzouga - Fes - Chefchaouen Week 6 - Morocco to Cadiz & Seville Week 7 - Seville to Portugal Week 8 - Porto to Pontevedra, Spain Week 9 - Muxia & the Lighthouse Way Week 10 - Muxia, Spain to Plymouth, UK
- Marrakesh to Todra Gorge Road Trip - Week 4
The fantastic scenery near Telouet Contents 24 April 2024 - Marrakesh 25 April 2024 - Marrakesh 26 April 2024 - Marrakesh to Ait Benhaddou 27 April 2024 - Ait Benhaddou to Zagora 28 April 2024 - Zagora to Skoura 29 April 2024 - Skoura to Todra Gorge 30 April 2024 - Todra Gorge Links to other blogs about our Road Trip 24 April 2024 - Marrakesh We had a quiet morning doing laundry and other chores after our long drive from Taradouant yesterday. We took a taxi into the old part of Marrakesh at around 13.00. It felt pretty hot and the driver thought it was 35 degrees centigrade! We explored Marrakesh's souks for a while. The souks were a maze of numerous alleys lined with stalls selling all sorts of things: spices, pottery, carved wooden objects, leather bags and babouches (traditional Moroccan slippers), carpets, fabrics, clothes, dried fruits, antiques etc. We wanted to find specific souks that specialised in items like leather, metal, dyed wool etc. However, it was difficult locating them and we ended up just wandering around. It is quite possible that these specialised souks no longer exist. We then went to the Almoravid Dome which was built in 1106 and it is thought to be the oldest building in Marrakesh. It was part of a richly decorated mosque that was destroyed in 1156 by the Almohad dynasty. However, we didn't enter as the fee was excessive. Our next stop was the Ben Yousef Medersa, one of the oldest and largest Islamic schools founded in the 14th century. It's a beautiful building and probably the best sight in Marrakesh. We wanted to see the Mouassine Fountain which dates back to the 16th century . Sadly it was badly affected by the earthquake in late 2023 and was closed. The surrounding buildings have been supported by scaffolding to prevent them from collapsing. It was hot and tiring walking around Marrakesh so we stopped for a drink at a roof top cafe. Afterwards we went to the Djemaa el-Fna square but it was too hot and the evening street entertainment hadn't started. We had a meal at one of the roof top restaurants overlooking the Djemaa el-Fna square. The evening entertainment still hadn't commenced by 18.30. We therefore walked over to the nearby Koutoubia mosque that dates back to the 12th century. Non moslems can't enter so we just walked around the exterior. At dusk we returned to the Djemaa el-Fna square. It was fun walking around the numerous fruit juice and food stalls. All the vendors were very friendly and tried to entice us to buy from them. However, we had already eaten. There was some very limited entertainment in the Djemaa el-Fna square. It was mainly for Moroccans and we were expecting a lot more and a lot better. We will return a bit later tomorrow evening to see if it improves. 25 April 2024 - Marrakesh We spent most of the day relaxing in the apartment and then took a taxi into the centre of Marrakesh in the late afternoon. We visited the Jewish Mellah district. T he majority of the Jewish population left when the French pulled out of Morocco in the 1950's and there are no longer any Jews living there. Moroccans took over their houses but recently the offspring of the Jews who vacated the houses have returned and are trying to reclaim them. Afterwards we wandered around Marrakesh's souks and had dinner at a roof top restaurant. Before heading back to the apartment we went to Djemaa el-Fna square to see if it was any more entertaining than yesterday. It was absolutely buzzing in Djemaa el-Fna square at 22.00 but all the entertainment was for Moroccans like yesterday. There were many groups of men, surrounded by spectators, playing their music loudly. There were also snake charmers and storytellers. I don't think that Djemaa el-Fna square is of much interest for foreigners. 26 April 2024 - Drive from Marrakesh to Ait Benhaddou We drove south from Marrakesh over the 2,260 metre high Tizi n Tichka mountain pass. Google maps said it would take about 3.5 hours but it took 6 hours even though the road was very good. The scenery was very beautiful, particularly on the section of the road via Telouet, and we frequently stopped to take photos. We stopped off to see an old Kasbah at Telouet. Unfortunately it was affected by the earthquake and has been closed. We arrived in Ait Ben Haddou at 17.00 and then walked up to the top of the hill to explore the Kasbah and the fortified village. The buildings are made of mud and straw. It is now very commercialised and there were quite a few other independent tourists there. Luckily there were no tour groups but we were told that there are plenty during the day! 27 April 2024 - Drive from Ait Benhaddou to Zagora We drove south from Ait Benhaddou to Zagora today. It is a very scenic route along the Draa river valley with views of the Atlas mountains, oases and old kasbahs. The mountain scenery on the road north of the town of Agdz was very impressive. The Draa River is Morocco's longest river at 1,100 kilometres long, flowing from the High Atlas Mountains to the Atlantic. Zagora is in the Draa River Valley which is described as being green and lush. Sadly Morocco has been struggling with drought conditions the past few years and many of the palm trees were turning brown. We saw the impressive Kasbah Tifoultoute soon after leaving Ouarzazate. It appeared to be a hotel and we didn't visit it. After passing the town of Agdz we stopped at two Kasbah's. The first one was Kasbah Cheikh Arabi and we each paid Eur 2 to enter and look around. The second one was Kasbah Oulad Othmane and we only walked around the exterior as it was closed. We stayed in a small guest house in Zagora that had very good reviews on Booking.com . The guest house was good but the owner was a bit strange. It was the first hotel in Morocco where no one spoke English and I used my limited French. 28 April 2024 - Drive from Zagora to Skoura We drove about 30 minutes south of Zagora to the Tinfou Dunes. They are part of the Agafay Desert which borders on to the Sahara. It is popular with tourists and we were lucky to arrive 15 minutes before the day's first bus load of tourists. We then drove back towards Zagora and stopped to see the old Islamic library at Tamegroute. It has old manuscripts and books on a variety of topics apart from religion, such as poetry, science, mathematics, medicine etc. Sadly Tamegroute's library was closed as it was the weekend but we could still visit the ancient Kasbah next to it. There were several guides milling about, offering to show us around Tamegroute's Kasbah which is still lived in, the pottery making and the pottery shop. They all denied that they were guides! We walked with a "guide" around the Kasbah and followed him through dark and gloomy covered alleyways and houses to the pottery area. Tamegroute's Kasbah was very atmospheric and we enjoyed it. The pottery was also very interesting. They use the branches of the palm trees to fire up the old brick ovens. They showed us the modern metal ovens that Germany had donated. Unfortunately they aren't used as they are heated by gas which is too expensive. We walked around Tamegroute's Kasbah for over an hour with our guide and he gave us a good tour. We didn't buy any pottery at the shop but gave him Eur 5 for his efforts. It wa s probably too much as he seemed happy. We then returned northwards to Skoura along the Draa River valley we had driven down yesterday. We visited the Kasbah Amerdihl in Skoura. It was passed down to two brothers who have fallen out. They have split Kasbah Amerdihl and there are two separate entrances and 2 separate entrance fees! We were told that the right section of the Kasbah was the more interesting part and just visited that section. 29 April 2024 - Drive from Skoura to Todra Gorge We drove north-east from Skoura to Todra Gorge. On the way we visited the Valley of the Roses where 3,000 to 4,000 tonnes of rose petals are harvested every spring. It took us over an hour to drive up the Valley of the Roses to the village of Bou Thrarar. The road to Bou Thrarar was tarred the entire way but was narrow. We expected to see masses of rose bushes in the Valley of Roses but they were very sparse. The roses may have been affected by the drought that has affected Morocco over the past 7 years. We have even seen dying cacti! The scenery was great. Unfortunately as we drove along the sky got darker. As we reached Bou Thrarar it started to rain and even hail at times. The temperature dropped to 10 centigrade and I was cold in my shorts! We reached our hotel at Todra Gorge at about 17.00. We were very pleased with our choice of hotel which cost Eur 67 a night through Booking.com . The hotel was only one year old and we had a very nice and spacious room overlooking the oasis and the mountains. The weather soon cleared up so we walked 15 minutes through the oasis to Todra Gorge. It was cold and there weren't many other people there. Todra gorge was very spectacular and its walls rise very steeply above it. It was windy and cold and we didn't linger. 30 April 2024 - Todra Gorge Hike & Drive to Tamattouchte We left our hotel at 09.00 to drive through Todra Gorge. It was fairly quiet with not too many cars on the road. The vendors were beginning to set up their stalls along Todra gorge. We continued driving on to the village of Tamattouchte which my 2004 Lonely Planet guidebook said was a stunning Berber village. The road was tarred but was narrow except for a section near an empty new dam. We turned around just after Tamattouchte which unfortunately is no longer a stunning village! The drive to Tamattouchte was very scenic though. We got back to Todra Gorge at 11.00 and the tour groups had arrived! Todra gorge was now full of tourists and cars. We returned to our hotel and then quickly set off for a hike up into the mountains above Todra gorge. The trail was about 12 kilometres long and we ascended about 400 metres above Todra Gorge. It took us four and a half hours with lots of stops for photos! It is the most popular trail in Todra gorge and we saw about 12 other hikers. Links to other blogs about our Road Trip from England to Morocco Week 1 - Salamanca, Toledo, Cordoba & Granada Week 2 - Spain to Morocco Week 3 - Southern Morocco Week 5 - Todra Gorge - Merzouga - Fes - Chefchaouen Week 6 - Morocco to Cadiz & Seville Week 7 - Seville to Portugal Week 8 - Porto to Pontevedra, Spain Week 9 - Muxia & the Lighthouse Way Week 10 - Muxia, Spain to Plymouth, UK
- Todra Gorge - Merzouga - Fes - Chefchaouen Road Trip - Week 5
The Desert at Merzouga Contents 1 May 2024 - Todra Gorge to Merzouga 2 May 2024 - Merzouga to Midelt 3 May 2024 - Midelt to Fes 4 May 2024 - Fes 5 May 2024 - Fes 6 May 2024 - Fes 7 May 2024 - Fes to Chefchaouen Links to other blogs about our Road Trip 1 May 2024 - Drive from Todra Gorge to Merzouga We drove south from Todra Gorge to the small town of Ainif and then turned east towards Rissani and Merzouga. The road was in good condition, with interesting scenery and little traffic. When we got closer to Merzouga the wind picked up and sand was blowing across the road. By the time we reached Merzouga the temperature was 31 centigrade. Our hotel was on the outskirts of Merzouga and just across the road from the Erg Chebbi desert. At 18.00 we walked up the nearby sand dunes. Unfortunately the wind had really picked up and we had to protect our eyes. It wasn't possible to sit down for long to admire the desert scenery. Many people spend 1 night in a hotel in Merzouga and then 1 or more nights in the desert. It didn't appeal to us as it is very touristy and most tours follow the same route and stay in the same locations. We also didn't fancy an uncomfortable camel ride. After experiencing the blowing sand I was sure we had made the right decision. The hotel manager told us that the wind had been very strong for the previous 2 weeks. 2 May 2024 - Drive from Merzouga to Midelt Early this morning we noticed large groups of cyclists heading into the desert. They were part of the Titan Desert Bike Race that starts in the Atlas mountains and ends in the dunes of Merzouga. It covers 600 kilometres with 7.5 kilometres of ascent. Usually about 600 cyclists take part. We left Merzouga via a different route from yesterday as we were heading north to Fes, but stopping at Midelt on the way. The road today was busy with 4 wheel drive tour vehicles and several large groups of motor bikers. We didn't enjoy the route or scenery until after we passed Erfoud. After Erfoud the scenery improved and there was a large oasis that was still very green. Then after Er-Rachida the road was much quieter and we lost the desert tourists. The road went past the Hassan Addakhil Reservoir and through the beautiful Gorges du Ziz. We had been coping well with all the police roadblocks and had never been questioned by the police. At a road block close to Midelt a policeman waved us through. Another policeman then pulled us over and wanted to know why we hadn't stopped! Fortunately the first policeman admitted that he had allowed us through! I had booked a 2 bedroom apartment at Midelt through Booking.com for Euro 80. One of its attractions was a washing machine as we needed to do 6 days of laundry. The apartment was new and exceptionally well furnished and equipped. Unfortunately the sound proofing wasn't good and 2 noisy families in the apartments below disturbed us. 3 May 2024 - Drive from Midelt to Fes The drive from Midelt to Fes was very scenic and rural. We were stopped twice at police roadblocks even though we complied exactly with all requirements. As soon as they realised we were foreigners they waved us on. In 2004 we stayed in the Palais Jamais which was a fantastic Sofitel hotel on the edge of Fes's medina. Unfortunately it closed in 2014 and it is now being rebuilt. There are now many Riads in the medina that have been converted into hotels. However, I find that Riads are dark and gloomy with windows facing into a courtyard. After a lot of research I booked a room at the Fes Heritage Boutique Luxury Hotel . It was expensive at Euro 160 per night but it was only a 5 minute walk away from the main gate of Fes's medina and had the best reviews for a hotel. We were delighted when we arrived to find that they had upgraded us to a suite. In the late afternoon we had a wander through the medina. We were in Fes 20 years ago and we could certainly see some changes. It doesn't feel as medieval because: There are lots more tourists and even large groups go into the medina. Tourists can find their way around Fes's medina using Google Maps whereas before you would become disoriented once you left the 2 main alleys. There are very few donkeys transporting goods. The cry of balak, balak used to warn pedestrians of passing donkeys There is very little skilled craft work being done as most items can be manufactured more cheaply. Despite that Fes has the best medina in Morocco and probably the world. Fortunately it is still pedestrianised and one doesn't have to contend with motor bikes like in Kathmandu. 4 May 2024 - Fes In 2004 we could only find our way around the medina of Fes by using a Tourist Board guide book and signs that had been put up in the medina. Unfortunately the signs no longer exist but we used the guide book, and Google Maps, to do five of the sight seeing circuits in the book. We set off while it was still fairly cool to do the Fes Jdid circuit. Fes Jdid translates as New Fes but it actually dates back to the 13th and 14th centuries. At the time Fes Jdid was new as the medina of Fes el Bali dates back to the 11th century! We took a taxi to the Royal Palace Gate in Fes Jdid which was built in the 1960's. We were surprised and disappointed to find 2 tour buses already there. In 2004 we were the only tourists. I had unfortunately forgotten my map and notes and was struggling to find the synagogue and cemetery. We were soon approached by a man who gave us a quick tour around the Jewish quarter of Fes Jdid. He wasn't happy with the Eur 1 that I gave him! We walked back to our hotel via Moulay Hassan square, Bab Shaa and the beautiful Jnan Sbil Garden. The garden covers an area of 7 hectares. It was an imperial park and opened to the public at the beginning of the 20th century. We stopped for lunch near Bab Boujloud, which is the main gate of Fes's medina. The outside of this gate is blue and the inner side is green. We ate at a restaurant on the rooftop terrace, which was the same location where we had several meals 20 years ago. We then followed part of Fes's Monuments and Souks Circuit and visited the following places: The Fountain at the Nejjarine complex. Foundouk el Nejjarine. A Foundouk is a building designed as a rest stop for merchants and visitors. This one was built in 1711. The woodwork was beautiful. It is now a museum with many exhibits of the carpenters' handiwork. Souk Henna which surrounds an old tree. Qaraouyine mosque. Non moslems cannot enter. We took a photo from the rooftop of an adjacent building as the narrow lanes prevent a good view from street level. It was built in 859. Medersa Attarine built in the 14th century. It has a beautiful courtyard that leads into a square prayer hall. The student accommodation was above. Moulay Idriss Mausoleum which contains the tomb of Idris II who ruled Morocco from 807 to 828. Non moslems aren't allowed to enter. It was extremely busy both inside and outside the mausoleum. 5 May 2024 - Fes We set out on the Palaces and Andalusian Gardens Circuit which is on the eastern side of Fes's medina. It is mainly a residential area of Fes and the alleys are quiet. Sadly a lot of the palaces are not open to the public, either falling into ruin or in private hands. We had a peek into the beautiful Palais des etoiles (Palace of Stars) owned by the Italian consul. It was an oasis of tranquility. The Palais Abdeslam Moqri was in disrepair but there is a bit of restoration happening. Some children showed us around. We then visited a few things we missed from yesterday's Monuments and Souks Circuit. The first was the Medersa (Islamic school) Bouinania built in the 14th century. We chatted to an interesting family, an 80 year old father who had lived at the Medersa in the 1970s and his 3 children. The Dar al Magana (House of the Clock) was across the alley . It was built in 14th century and houses an unique water clock. The clock consists of 12 doors and platforms carrying brass bowls. Every hour, one door opens and a metal ball drops into one of 12 brass bowls. A rope with a weight attached is also involved. The final sight was Place Seffarine which is known for its coppersmiths. We had Moroccan tea on the rooftop terrace overlooking the square. It was fascinating to watch a craftsman heat up a copper object, then add a powder which then turned the inside silver! It was probably a chemical reaction. There are plenty of shops in Place Seffarine selling metal objects and there was an alley off the square where they were dying wool and hanging it in the alley to dry. 6 May 2024 - Fes It was our last day in Fes. We first walked down Talaa Kebira, which is the slightly quieter of the 2 main alleys in the medina. It was quieter than at the weekend, although later on we encountered large tour groups near the main tannery. An unofficial guide then showed us around a small tannery on the western side of Talaa Kebira . Fes has 3 tanneries and very few people visit this one. There weren't any other visitors when we were there and the guide showed us how: The hides are soaked in stone vats in a mixture of pigeon faeces and chalk to clean and soften them. After this they are able to soak up the dyes more readily. Only natural pigments are used: poppy for red, henna for orange, indigo for blue etc. The hides are scraped to clean and soften them. A huge wheel is used, like a spinning drum of a washing machine, to rinse the hides. The hides are dried in the sun. It is dirty and very smelly work. I wouldn't want to do it to make a living. We then visited the other small tannery on the eastern side Talaa Kebira. There were other visitors there and some shops overlooked the tannery. The Chouara tannery is the largest and oldest in Fes. It dates from the 9th century! To reach the terraces overlooking the tannery you have to walk through shops selling leather goods! You are given a sprig of mint to neutralise the smells and invited up to the viewing terrace overlooking the vats. I didn't find the smell as bad as I did 20 years ago. 7 May 2024 - Drive from Fes to Chefchaouen I didn't sleep well last night as I have caught a cold. We were very sad to leave Fes this morning after a very enjoyable 4 days there. However, we probably won't go back again as Fes has changed too much since we were last there 20 years ago. Mass tourism spoils places. The 4.5 hour drive from Fes to Chefchaouen was very scenic with rolling hills and fields of wheat, spinach and poppies. We passed quite a few herds of goats and sheep. Sadly the road soon disintegrated with eroded edges and deep potholes. It didn't improve until we joined the N13 that goes from Meknes to Chefchaouen. Chefchaoun was founded in 1471, just before the Spanish Reconquest of Granada, when its population quickly grew with Muslim and Jewish refugees fleeing Spain. The descendants of the Jewish refugees painted their houses blue in the 1930's and now Chefchaouen is known as the Blue Town. The old medina of Chefchaoun is a very beautiful with all the blue buildings. Unfortunately most of the streets are lined with tourist shops. There aren't any shops for the locals and they are all outside the medina. We were tired of Moroccan food so we went to Mr Bin Chinese Restaurant that had been recommended on the Tripadvisor Travel Forum. The food was very good and it was a nice change from Tagines! Links to other blogs about our Road Trip from England to Morocco Week 1 - Salamanca, Toledo, Cordoba & Granada Week 2 - Spain to Morocco Week 3 - Southern Morocco Week 4 - Marrakesh to Todra Gorge Week 6 - Morocco to Cadiz & Seville Week 7 - Seville to Portugal Week 8 - Porto to Pontevedra, Spain Week 9 - Muxia & the Lighthouse Way Week 10 - Muxia, Spain to Plymouth, UK
- Morocco to Spain Road Trip - Week 6
Seville's Cathedral Contents 8 May 2024 - Chefchaouen, Morocco to Cadiz, Spain 9 May 2024 - Cadiz 10 May 2024 - Cadiz 11 May 2024 - Outing to Jerez de la Frontera 12 May 2024 - Cadiz to Seville 13 May 2024 - Seville 14 May 2024 - Seville 15 May 2024 - Seville Links to other blogs about our Road Trip 8 May 2024 - Chefchaouen, Morocco to Cadiz, Spain I had a very bad night's sleep due to my cold. I didn't want to get up but we had to leave the hotel at 08.30 to ensure we reached the port of Tangier Med in time for our ferry to Spain. It was sunny when we left Chefchaouen but it was very windy and cloudy as we drove through Tetouan an hour later. The countryside was very green and we passed several dams that were fairly full. The nearby Rif mountains must provide a good rain catchment area as the southern part of Morocco is suffering from drought. The ferry sailing time was 13.30 but the ferries are often very late. We arrived at the port of Tangier Med at 11.00 and were pleased to see our vessel in the port. There were several passport, ticket and customs checks as well as the process of having the car X-rayed! We drove onto the ferry at 12.00 and they announced that the ferry would leave at 13.00, which would have been 30 minutes early! However, the ferry only departed Tangier at 14.00. This could have been because a lot of trucks were loaded onto the ferry after we had boarded. We were relieved to leave Morocco without being caught by one of the numerous police roadblocks! We are also very relieved that there were no mechanical issues with the car in Morocco. We finally reached our apartment in Cadiz at 17.45. It had been a long day and I had been very unwell. The owner of the apartment met us and directed us into the underground garage. He said it was easy to park but it wasn't! The entrance was very tight and the parking space even tighter. Unfortunately this is often the case in Spain. It was very windy in Cadiz and unfortunately it was forecast to continue for several days. 9 May 2024 - Cadiz We had a relaxing morning and did our laundry. I was feeling a lot better but still a bit tired. Unfortunately Lani had caught my cold and she didn't have a good night's sleep. At midday we drove 30 minutes to the historic centre of Cadiz. We were shocked to see 3 huge cruise ships in the port and a lot of passengers walking around. Cruise ships are another of our dislikes as it crowds out places of interest. We had a good meal at a restaurant and then walked around the coastline of the historic centre of Cadiz visiting 2 forts, 2 cathedrals and a park. By the end Lani wasn't feeling well so we walked back to the car park through Cadiz's historic centre. When we got back to the apartment I parked on the street instead of in the garage! 10 May 2024 - Cadiz Lani was feeling very unwell today so we just relaxed in the apartment. 11 May 2024 - Outing to Jerez de la Frontera Lani felt a little better today so we set off for Jerez de la Frontera which was a 30 minute drive away from our apartment. The Rough Guide Book said it was an elegant and prosperous town and famous for sherry and brandy. I researched car parks in Jerez de la Frontera before leaving as parking can be a nightmare in some Spanish towns. I found a car park in the centre ( Parking APK2 Plaza del Arenal ) that had good reviews and the parking spaces didn't seem to be too tight. It turned out to be very central, cheap and the parking spaces were okay for Spain. Jerez de la Frontera is certainly an elegant and very pleasant town. We couldn't participate in sherry tasting as I was driving and Lani was sick. The main thing to do was to visit the Alcazar (fort). It was built in the 11th century and formed part of the Jerez de la Frontera's defences. The entry price to the Alcazar was Eur 5 but as we are over 65 we only had to pay Eur 1.80! It turned out to be a real bargain as there was much more to see than we had thought. We spent more than an hour wandering around and really enjoyed our visit. Lani was still feeling ill so we had a late lunch in the Plaza del Arenal and drove back to our apartment. This cold has badly affected us for a few days but luckily it wasn't at a crucial stage of our itinerary. There is a lot more to do at our next stop in Seville and it would have been a shame not to be able to enjoy it. 12 May 2024 - Drive from Cadiz to Seville There have been high winds in Cadiz since we arrived 4 days ago but thankfully this morning the wind finally died down. Unfortunately Cadiz often has high winds between May and October and it is known as the Levante wind. We left Cadiz at 12.30 as it was only a 1 hour 40 minute drive to Seville. It was a hot day and as we drove the temperature reached 31 centigrade. It was a good highway to Seville and free like all the other highways we have so far used in Spain. We had booked a 2 bedroom apartment in Seville for 4 nights through Booking.com and it cost Eur 150 a night. It had free parking which is a big bonus in Seville. Accommodation in Seville is expensive and parking is difficult. We couldn't find a decent hotel room for less than Eur 150 a night in Seville when including parking and breakfast. It is always more of a hassle checking into an apartment than a hotel. The hassles began when the owner of the apartment in Seville wanted us to use an App to record our passport details before giving us the apartment address. We have been required to do this for some of our other bookings in Spain. Sometimes the Apps are easy to use and sometimes they aren't! This App was in Spanish and was complicated. We therefore emailed our passports to the owner and he entered the details for us. When we arrived in Seville we had to collect the apartment keys from a bar, then park the car in an underground car park and afterwards walk 5 minutes to the apartment. It was a bit complicated but it worked out alright in the end. The apartment was very nice. Lani was still feeling off from her cold and as we had 4 nights in Seville we just did some grocery shopping and relaxed for the rest of the day. 13 May 2024 - Seville There is a lot to see in Seville. The 2 main sites are Seville Cathedral and the Royal Alcazar and I had booked tickets online for both of them to save queuing for tickets. For today we had tickets for the Cathedral and its tower (La Giralda). The tickets usually cost Eur 17 but we paid Eur 11 as we got an over 65 discount. The cathedral only opens at 10.45 each morning and we had tickets for 10.50. We arrived a bit early and were dismayed to see so many tour groups in the vicinity. If you have read any of my other posts you will know that we don't like tour groups and mass tourism. Although we didn't like the sight of the tour groups the sight of the cathedral was very impressive. The construction of the cathedral commenced in 1402 and it took just over a century to complete. It was built on the huge rectangular base of an old Almohad mosque. The total area of Seville's cathedral covers 11,520 square metres, making it the largest Gothic cathedral in the world. La Giralda was originally the minaret of the mosque but it was converted into the cathedral's bell tower. The Moors wanted to destroy it before the Christians' reconquest of Seville but the Moors were threatened with death if they removed a single stone. The impressive tomb of Christopher Columbus is in the cathedral. His remains were transferred here in the early 1900's when Cuba gained independence. We spent about 2.5 hours in Seville's very impressive and opulent cathedral. Afterwards we had lunch in a nearby restaurant and then walked to the Plaza de Toros which is Seville's historic bull fighting arena dating back to the 18th century. Luckily we got a reduced rate for being over 65 as there wasn't much to see. From there we walked over to the Torre del Oro (Tower of Gold) which was built in the 13th century as a defensive lookout tower. It used to have a companion tower on the opposite bank, with a metal chain stretched between them, to prevent hostile ships from sailing upriver. 14 May 2024 - Seville In the morning we walked via the Murillo gardens to the 17th century Hospital de la Caridad. It has an excellent chapel and several paintings by famous artists. The hospital obviously didn't lack funding! Afterwards we wandered around Seville and its old Jewish area until lunch time. Seville is an exceptionally pleasant city and unfortunately many tourists like it! For lunch we had tapas at a bar called Casa Pepe Hillo which had good reviews on the internet. The food was good. For the afternoon we had tickets for the Royal Alcazar and the tickets included a guided tour of the Royal apartments. The normal cost was Eur 20 but we again benefited from being over 65 by getting a reduced rate of Eur 13.50! Our tour of the Royal Apartments was at 15.30 and we had to be there at least 15 minutes before that. They have strict security as the apartments are still used by the Royal family at times. It was only a 25 minute tour but it was very interesting. Unfortunately it was forbidden to take photos. We then continued around Seville's Royal Alcazar (the Royal Palace). It was originally built as a citadel in 10th century by the Moors. The Almohads developed it into a larger palace complex in the 12th and 13th centuries. In 1364 Pedro 1 of Spain (Pedro the Cruel) ordered the construction of a Royal Residence within the Almohad palaces. We thought that the Royal Alcazar was probably more impressive than the Alhambra in Granada. 15 May 2024 - Seville This was our last day in beautiful Seville. We walked to the Plaza de la Encarnacion where a 150 metre long by 30 metre high wooden structure was completed in 2011. It is claimed to be the world's largest timber structure and it was very impressive. It's officially called the Metropol Parasol but everyone refers to it as Las Setas (The Mushrooms). It is possible to walk on the top of it but we didn't as the admission fee was Eur 10. On the way to Las Setas we were surprised to pass the Pilate's House which hadn't been mentioned in our guide books. Tour groups were visiting it but we didn't enter as we knew nothing about it and the entry fee was Eur 10. I later researched the Pilate's House and it is a very beautiful mansion constructed in the 15th century. After seeing Las Setas we walked over to the Archivo de las Indias for which there is free admission. The Archivo de Las Indias was set up in 1785 at the request of King Charles III to keep all the documents relating to the administration of the Spanish Overseas territories. The main features of the Archivo de Las Indias are a beautiful staircase and two enormous rooms housing some 43,000 files, books and maps. After lunch we walked to the Triana area of Seville and then onto Maria Luisa Park. This is a public park that stretches along the Guadalquivir river. The impressive Plaza de España was built in the park for the Ibero-American Expo that was held in Seville in 1929. ; Links to other blogs about our Road Trip from England to Morocco Week 1 - Salamanca, Toledo, Cordoba & Granada Week 2 - Spain to Morocco Week 3 - Southern Morocco Week 4 - Marrakesh to Todra Gorge Week 5 - Todra Gorge - Merzouga - Fes - Chefchaouen Week 7 - Seville to Portugal Week 8 - Porto to Pontevedra, Spain Week 9 - Muxia & the Lighthouse Way Week 10 - Muxia, Spain to Plymouth, UK